Thursday, August 30, 2012

Ikan gerang asam

I am swamped! Literally...with too much work. :P I guess I have myself to blame. It usually happens when I can't blurt out the word "No" ( in the most polite way of course). If you know what I am talking about, it's taking up bake orders from friends and neighbours. The funny thing is I made myself promise not to take any more big orders this year, and there I go again breaking it like nobody's business. :P Although I did find it fun taking up these bake challenges, but again the time involved can be so demanding on me. Anyway, I have just delivered off today's order and hoping to catch a breather. I am not even gonna start on the back logs I have for these few weeks. *haiz* :P
Back to today's post, I have again took up the challenge in cooking yet another traditional noyna dish, Ikan Gerang Asam. For an all Chinese girl like me that has never (except this time) attempted cooking a nonyna savory dish, the very name of this dish itself can be a little intmidating, hahaha! Since I had some belimbing left after cooking Sambal Belimbing Prawns, so why waste it, make something delicious of course!
I read through Wendy's and Alan's ikan gerang asam recipe and incoroprated them together to make my dish. :)) So thanks very much guys!
Ingredients for Ikan Gerang Asam: (Serves 4 ppl)
Spice Paste:
3-4 tbsp dried chilli paste (refer here)
8 shallots, peeled and cut half
3 cloves of garlic, peeled
3 candlenuts
1 lemongrass, the inner white portion, 4" from the base
1/2 thumb size of tumeric, peeled & sliced
1/2 thumb size of galangal, peeled and sliced
1/2 tsp belacan
  • To prepare the spice paste, place all the above ingredients in a spice blender and grind till become a smooth paste. Set aside for use later.
400g mackerel
2 tbsp tamarind paste, mixed into 400ml water, seeds removed
10-15 okra (lady's fingers), head removed and cut half
1 tomatoes, sliced to 6 wedges
1 small egg plant, cut into wedges
6-8 belimbing, cut half
2-3 kaffir leaves
4 tbsp cooking oil
Salt and sugar to taste
  • In a large wok, add cooking oil and heat up at medium fire. Add in the spice paste and saute till fragrant, about 5 minutes.
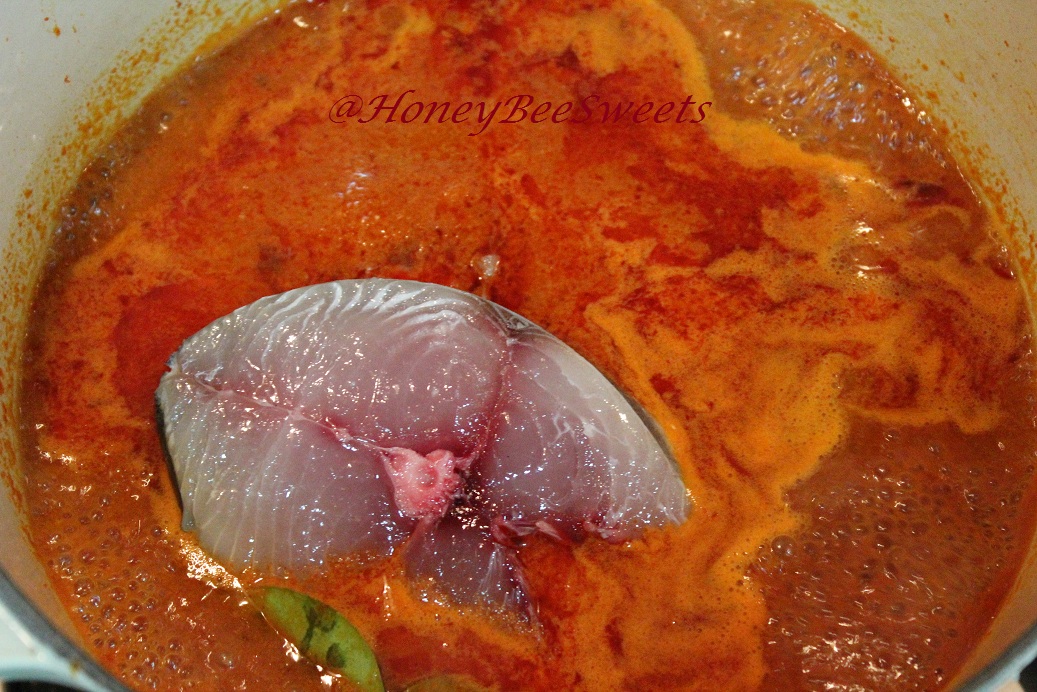
  • Then add in the tamarind water mixture and bring to a boil. Then lower the fire to low and gently slide in the mackerel and simmer for a minute.
  • Then add in the sliced vegetables and cook for another 4-5 minutes. Off the fire, then cover and let rest for 5 more minutes. Dish up and serve while still hot.
This is actually not a diificult dish to cook. All you need is gather the right ingredients and ta-lah, a homey noyna dish right in your kitchen! I am pretty happy with this dish. The taste is awesome, spicy, sweet and slight sourness which hits the right spot! Delish! Had it with loads of steamy rice and it was goooood! :))
Thanks again for the inspiration Alan! I can proudly say I am no alien to noyna dishes from now on, haha!
I am happy to submit this post to Malaysian Food Fest, Melaka (August) hosted by Yummylittlecooks and organized by Wendy of Table For 2.....Or More. Thanks for hosting ladies!
Signing off now to get a well deserve rest. Have a "early" great weekend all!

Wednesday, August 22, 2012

My First Sambal Belimbing Prawns

I did it! I finally made an all traditional Nonya dish. :) I have to say it didn't come as easy as I thought. But somehow all the pieces just fall in place. *thank goodness* Let me elaborate. I was invited to join the Melaka Food Festival (I'm sure many of you are) for the month of August. I was really keen and eager, with plans to make some nonya kuihs. But then I told myself, why not make something out of the norm (for me), a savoury dish perhaps. So I started reading recipes online, browsed through books I owned. But sadly I have never made any of those dishes before, and thus was alittle hesitant to try, for fear that it might turn out tasting horrible.

Just over the weekend, some of the bloggers here in Singapore had a gathering and I was happy that I could join in. Prior to the gathering, Alan from travellingfoodies, had put up an offer to help harvest some belimbing fruit for those who might be interested to use it for cooking. Oh my gosh, of course I won't miss that! I could totally use that fruit for a nonya dish I read about! Belimbing is pretty rare here in Singapore...well at least I don't know where to get it, hahaha! So I have to thank Alan for passing me this precious fruit and thus making my first submission to MFF possible! Sounds a little dramatic, but it's true, haha! If you have not visited Alan's site before, you have better make your way there later....it has so many authentic nonya dishes that will make any nonya mama proud!

Okay back to my post. I have to say I am quite proud of the dish I made. My virgin attempt on a savoury nonya dish has really (fortunately too) turned out delicious. Sambal Belimbing Prawns:))
I believe this is also the first spicy dish that is posted here in HBS! Having two young kids at home just doesn't allow much opportunities for me to try out spicy dishes. :P *excuses!* Anyway, my kid did give this dish a small bite....she said "Mama...this is very nice...hah...hah...hah...too spicy!" The rest is history, hahaha!
The "venture" to getting this dish didn't stop just then. I was tight down with other matters over the weekend and didn't get a chance to get the other necessary ingredients needed for this dish, namely kaffir lime leaves, belacan, dried chilis and prawns. :P And I began to worry that those belimbing that Alan pass to me will not stay fresh so long. But luckily my MIL had some belacan to spare and my SIL had some dried red chilis as well. And just yesterday, Joyce from Kitchen Flavours posted her Sambal Belimbing Prawns. I was like "Goodie! Now I have a good and trusty recipe I can follow!" I know, what are the odds? I have to say, I'm really lucky that all these came in place at the right time to make it all possible, haha!

I adapted Joyce's recipe and made slight modification which I used ready made dried chili paste instead of going through the process of soaking and blending it. It is so much more convenient to me! *lazy me* You can get these ready made dried red chili paste at any supermarkets. ;)
Ingredients for Sambal Belimbing Prawns (Serves 4 pax)
350g fresh medium prawns
3 tbsp dried chili paste (Or you can use 30g dried chili, soaked till soft)
6 cloves of shallots
3 cloves of garlic
1/2 tsp amount of belacan (shrimp paste)
10 belimbing fruits, sliced 3 pieces kaffir lime leaves
1 medium tomato, sliced to wedges
1 medium red onion, sliced to wedges
1/4 cup water, or more
1.5 tsp sugar
salt to taste
1/3 cup cooking oil
  • Remove the shells from the prawns, devined them. Marinate the prawns in 1 tsp of sugar and set aside for use later.
  • Blend the chili paste, garlic, shallots in the spice blender till ti combines to a smooth paste. Set aside for later use.
  • In a saute pan, heat up the cooking oil and add the paste in. Stir fry for 5 to 8 minutes till fragrant. Add in the kaffir lime leaves and continue to stir fry for another couple minutes.
  • Now add in the onions and cook for 2-3 minutes. Then add in the sliced belimbing fruit and the water. Stir till combined and cover the lid for a minute
  • Lastly add in the tomato wedges and prawns. Give it a stir, making sure the prawns are cooked and add sugar and salt to taste.
  • Dish up and serve while still hot. Yum!
Overall a very flavourful dish...best eaten with a plate (or two) of warm steamy rice. :)) The sourish taste from the belimbing is not over powering but it tickles yout taste buds and makes you crave for more! The sweetness from the prawns compliments the whole dish very well, super delish! Now I wish I have more belimbing! Hahaha! I am so glad I made this, it somehow made me realise this kind of dishes are not so "intimdating". :))

Again, thanks to all that has helped me make this dish possible in my very own kitchen. ;)

This goes with out saying but I am proud to submit this to Malaysian Food Fest, Melaka (August) hosted by Yummylittlecooks and organized by Wendy of Table For 2.....Or More. Yay!


Have a great day all! Now go cook something nonya. ;D


Friday, August 17, 2012

Wholewheat Raisin Loaf (50% wholewheat) / 低溫中種全麥土司麵包(50%全麥麵粉)

With our hectic lifestyles, I guess it's relatively hard to eat healthy unless you really make a point to do so. Many times it's a matter of choices. People tend to head for fast food just to save some time. But we don't realize all the bad build ups in our body until it's possibly too late. :P Maybe we can put in a little more effort to make our diet a little healthier, the pay off will be most rewarding in the end. And introducing more whole grains into our diet is one way to be healthier. I am always looking for healthy breads to bake, so bare with me if this is like the 5th or 6th wholewheat bread post in my blog, haha! I reckon there will be more in the future. ;P
I found another great wholewheat bread recipe from "妃娟與大、小拉拉的網路日誌". Once I saw this I was sold. No egg, low fat and low sugar wholewheat bread and yet taste great, how wonderful is that? Not really a fan of wholewheat? Don't fret, once you taste this, you will be a changed man...or woman. :)
This recipe is again using pre fermentation method which again I have to stress I am a strong believer in that. It yields a much tastier bread then other techniques, seriously. Although it is more time consuming in terms of the preparation, but the bread will retain softness longer and produce a better texture and taste. You have to try it to believe it. Well unless you are not as picky as me(on breads), I guess any method will. ;P
Ingredients for Wholewheat Raisin Loaf (Makes 2 loaves 9x4x5)
Starter Dough:
424g wholewheat flour
212g bread flour
8.5g instant active dry yeast
403ml water
  • Knead all ingredients of the starter dough together till it comes together as a soft pilable dough. Place dough in a large zip lock, seal and let rest for an hour. Then place dough in the fridge for up to 12 hours to 3 days.
Main Dough:
212g bread flour
8g salt
68g brown suagr
34g skim milk powder
160ml water

40g unsalted butter
    • Knead all ingredients of the main dough together, except the butter. Add pre-ferment dough piece by piece. Knead after each addition until soft and smooth. Add butter. Knead until stretchable and pass the window panel consistency.
    • Put the dough into a big bowl. Cover with cling wrap and let it prove for 30minutes till double.
    • This recipe is enough to makes two 9X5 loaves. So into 6 equal portions. Flatten each portion with your hands to drive the air out. Roll it into square shape, cover and let rest for 5 minutes before shaping.
    • For Loaf: Flatten the dough to drive the air out. Roll each out into a rectangular sheet with a rolling pin. Fold about 2cm from both sides towards the center and roll it out again. Roll the dough up like swiss roll (the width should be the same as the tin) and put them into the mould. Repeat for the rest of the 3 portions to make the other loaf.
    • Let it prove for about 30-45 minutes or until the dough has risen to 80 to 90% of the depth of the loaf tin. You can either cover the lid or bake it open top. Omitted the egg wash if you want to make it a vegetarian version. Bake in 175C for 30 to 35minutes. Cover with aluminium foil if the top is browning too fast.
    • Once baked, remove from oven and let cool in the loaf pan for 3 minutes. Then promptly remove the bread loaves from the tin and let cool completely on the rack before slicing or storage.
Quite amazing that 50% if the flour used is wholewheat and yet the end product was still as soft as any white loaf. The bread was really soft and springy. Love the addition of raisins, it makes it even more delightful to have it for breakfast, snack or supper. ;) Just spread on some cold butter and yums! The bread can stay soft up to 2-3 days. Simply place in fridge if you can't finish on the 3rd day and steam it up for 3-5 minutes and it'll be nice and soft again. ;)
Showing you all the "soft and tender" side of this wholewheat bread. ;) Try out this wonderful recipe and give your body something wholesome. ;)
Have a wonderful weekend all! And Selamat Hari Raya Aidilfitri to all our Muslim friends out there!

Monday, August 13, 2012

Red Velvet & Light Cheese Cake with Pink Ombré Roses

It was my mother's birthday last weekend, just one day after National Day. As usual, the whole family got together to celebrate this joyous occasion with her. We usually dine out at a nice Chinese restaurant of her choice and spent the night, dining and chatting away. I love family gatherings! And it goes without saying that I will bake a birthday cake for the birthday girl. No matter how many times I ask her what kind of cake she likes, she will always answer me the same thing, "Do whatever is convenient, don't need to be too elaborate. Or no need cake also can." That's my mum, forever worrying about troubling other people. Anyway,I figured that its not a bad thing too as I get to choose what I like to try out, hahaha! So I decided on something that I have been wanting to try like forever....Red Velvet & Light Cheese Cake with Pink Ombré Roses.
Baking the layers of the cake was easy, but I was pretty stressed out piping out the roses on this cake! It might look simple, but little did I know piping the roses on the side of the cake can be so difficult, especially when if one didnt get the right piping tip or the consistency of the cream is not right. It cannot be too cold or too warm. I had to redo a few times until I got it right and even so I felt it wasn't nice enough. :P And it was so rush in the end that I didn't have time to get nicer shots of the cake. *haiz!*
Despite of it all, I was still very happy how the cake turned out. It was one of those cakes that I actually won't mind having 2nds or 3rds....if I haven't already had a big dinner. ;P As you all know, old folks just can't stand sweet...so I have to reduce the sugar to considerable amount in the cake recipe and the cream cheese frosting as well. And adding a light cheddar cheese cake layer in the middle was one the best idea for making this, hahaha! Why? Because the light soft and slightly salty cheddar cake makes the taste so well balanced. ;) Perfect balance of sweetness and also making the cake lighter overall. Love it!
The red velvet cake recipe is none other then Martha Stewart's recipe. I have actually made this twice and it was very well received, so I knew I will use this recipe again soon. Was gonna post up the recipe earlier but my poor laptop gave in and I have no access to the photos as yet. Anyway, I will post the red velvet recipe (with slight modifications) here plus the frosting. Kindly refer to the light cheddar cheesecake here.

Ingredients for Red Velvet Cake (Makes 2 X 8" round)
285g cake flour, sifted
1 tablespoons unsweetened Dutch-process cocoa powder
1 teaspoon salt
180g sugar
365ml vegetable oil
2 large eggs, room temperature
1/2 teaspoon red gel-paste food color
1 teaspoon pure vanilla extract
1 cup buttermilk
1 teaspoons baking soda
2 teaspoons distilled white vinegar
  • Preheat oven to 170 degrees. Line and greased two 8" round cake pan. Whisk together cake flour, cocoa, and salt.
  • With an electric mixer on medium-high speed, whisk together sugar and oil until combined. Add eggs, one at a time, beating until each is incorporated, scraping down sides of bowl as needed. Mix in food color and vanilla.
  • Reduce speed to low. Add flour mixture in three batches, alternating with two additions of buttermilk, and whisking well after each. Stir together the baking soda and vinegar in a small bowl (it will foam); add mixture to the batter, and mix on medium speed 10 seconds.
  • Divide batter equally between the 2 cake pans. Bake, rotating tins halfway through, until a cake tester inserted in centers comes out clean, about 30 minutes.
Note that I doubled the recipe since it was a 3 layer cake plus roses to pipe. But I will only post one portion of the recipe for easier reference:
Ingredients for Cream cheese frosting:
340g cream cheese, soften227g unsalted butter, room temperature200g-225g confectioner's sugar ( I can't really recall the exact amount)1 tsp pure vanilla extract
Beat butter and cream cheese with a mixer on medium-high speed until fluffy, 2 to 3 minutes. Reduce speed to low. Add sugar, 1 cup at a time, and then vanilla; mix until smooth.
To assemble, place one red velvet cake as the base and spread some cream cheese frosting over. The top it with the Cheddar cheese cake. Then spread some cream cheese frosting on top and lastly top it off with the 2nd layer of red velvet.
Ice the whole cake with a thin coat of the frosting and chill. Once chilled, decorate as you desire. If you wish to pipe roses, try using the Wilton's 1M or 2D piping tips. Also use Wilton's food coloring gel to tint the frosting. Remeber lightest to strongest. I actually used a very light shade of pink for the cake coat as shown above. I worry the pink roses against the white background might be too big a contrast.
The cake was moist, creamy and incredibly delicious. I really love it to bits! Everyone, even my brother in law whom doesn't fancy cakes, said it's very good and keep sneaking a few mouthfuls from his daughter's share, hahaha! My mum loved it too and polished off her slice pretty fast, heehee. Happy Birthday Mum!! :) As for this cake, I am very sure I will be baking this again.
Okay, gonna end this post here. Have a great week ahead everyone!

Tuesday, August 7, 2012

Dreamy Soft Pandan Cake (香兰相思蛋糕 )

I am still stuck using my husband's laptop this week. Although his is much faster and better then mine, I still love my old laptop, haha! Anyway, hopefully my "old friend" won't quit on me again any time soon. :P I still have quite a few recipes in my old laptop that I want to post up...hopefully can get them up soon. So at the moment I can only share with you all those I made over the weekend. This particular recipe is probably one of the more popular ones now in the blog sphere; it's none other but "相思蛋糕" . If you ask me how to translate this...in correct term, it is call "lovesick cake", hahaha! But you know after I ate this cake, I know why it is called that! It is really very soft and dreamy, you'll love it so much that you probably get lovesick for it, heehee. :D
I was contemplating whether I should make vanilla versus pandan flavor. I went with the latter because it has been ages since I last baked anything with pandan. :P I used all natural pandan extract and thus the cake look kind of light in the shade of green.
I spread a generous layer of vanilla buttercream in between the cake and it tasted even better! It simply just melts in the mouth. :) ~Dreamy~

This lovely recipe comes from Siewhwei. Many bloggers out there has already gave this wonderful recipe a try and rave good reviews. So what are you waiting for? Hehehe..

I've reposted the recipe here for easier reference with minor changes made:
Ingredients for Soft Pandan Cake (香兰相思蛋糕 ) (makes 7x7 or 8x8 square)
Egg yolk batter
65g vegetable oil
80ml coconut pandan mixture (See Note *)
1/4 tsp salt
100g egg yolk (mine was approximately 6)
1 whole egg
65g superfine flour (I used Prima top flour)

Note* = I blend 6 spears of pandan leaves with 120ml of coconut milk. Then I squeeze out the milk mixture. Reserve 80ml for the batter.


Egg white Batter
200g egg white
70g caster sugar
1 tbsp corn flour
  • In a large mixing bowl, beat the egg yolks, whole egg, salt, coconut pandan milk mixture together till well combined.
  • Sift in the flour and mix well till no visible lumps. (set aside and cover)
  • Preheat the oven to 160C. Prepare water bath in the oven. Grease and line parchment paper a 8x8 square cake pan.
  • In the mixer bowl, add in egg white and beat till foamy. Then gradually add in the sugar and continue to beat till soft peaks. Then add in the corn flour and continue to beat till stiff peaks.
  • Gently flour in the egg white mixture to the egg yolk mixture in 3 separate portions and do not deflate the batter.
  • Pour batter into the prepared cake pan and bake in the preheated oven for 50 mins in water bath.
  • Remove from oven when the tester comes out clean and let cool on rack before slicing.
This soft and dreamy cake almost melts in your mouth once you take a bite...really really nice. I am already planning to bake this again using the yuzu powder that Sonia gave me, heehee. ;))
Have a great day and Happy 47th Birthday to Singapore!! ;D

Saturday, August 4, 2012

Summer Treat: Heavenly Milo & Oreo Jelly

The weather is getting hotter as summer heat moves in. But as much as we are enjoying nice warm weathers here with occasional showers, there are still storms and floods in parts of China, while terrible typhoons threathens the coast of Taiwan. Not to mention droughts in parts of US that results in poor crop yield and thus global food shortage. Mother nature is getting more tempermental then before as the global warming is getting more imperative, something that we shouldn't just ignore now. Have you been playing your part in helping our planet Earth? Perhaps recycling more, less usage of air conditioner or even your car might just be the first few steps. ;)
Okay, all this talk about our Earth, perhaps will trigger you a little to help out too....even in the smallest way.
Back to today's post. (^.^) Its a really simple summer treat and I think not only the kids will love it, the adults will too! ;P It's Heavenly Milo and Oreo Jelly which was posted by Rima from Bisous a Toi. When I saw this, I knew at that moment I have to try it out. ;)) But it's too bad mine didn't turn out as beautiful as hers. :P
Somehow I suspect the jelly powder I use does not "gelatinize"as well as the one Rima used. I shall up my jelly powder amount the next time I make this. Regardless the jelly was delish! Indeed heavenly and addicitive. ;))
The Milo and oreo flavor blend in really well. My kids loved it very much and so did I, hahaha! I must say I haven't enjoyed jelly this much for a long time. :)

I will repost the recipe here but with slight modifications. Thanks Rima for sharing!

Ingredients for Milo & Oreo Jelly:
15g Jelly Powder (Agar-Agar Powder)
650ml water
150g caster sugar
1 can (400g) Evaporated Milk / (400ml fresh milk is fine)
3/4 cup Milo Powder
1 pack (137g) Oreo Cookies - Break up the cookies and leaving the creme inside

  • In a large saucepot, add the water and jelly powder in. Heat the mixture and stir till jellypowder has dissolved.
  • Add in caster sugar & cook until sugar is dissolved. Then add in evaporated milk, stir to mix well then switch off fire once you see bubbles forming at the side of the pot.
  • Ladle out 2 cups of the jelly mixture into another pot and stir in the Milo powder. Continue to stir making sure all of the milo powder is properfly dissolved in.
  • Ladle about half of the Milo mixture into your jelly moulds and let the remaining half warm up on smallest fire.
  • Let the milo jelly set slightly in the mould (but not too much!) on surface before pouring the milk jelly layer on. when you ladle the milk jelly in, be at most caution else might end up mainx the two layers.
  • Sprinkle oreo cookies into the milk jelly layer. then let it set for awhile.
  • Lastly add the remaining milo mixture as the final layer. Let cool before putting into the fridge to chill for at least 2 to 3 hours. Serve cold.
Due to the insuffucient jelly powder I used, the jelly's texture turned out to be like those soy beanurd...a wee bit soft. But I guess different brand of jelly powder probably yield different texture. I love Pearl Mermaid Brand(from Thailand), it always gives really smooth texture. If you are using other brand, perhaps you might want to use the original amount of 10g instead of 15g.
Loads of yummy Oreo inside. ;)) Hope you folks will give this fun and delicious recipe a try.

Gonna sign off now. Wishing everyone out there a wonderful and relaxing weekend! Cheers!

Thursday, August 2, 2012

Easy Gourmet Pumpkin Soup

Apologies for the slow posting this week, but my laptop has been giving me problem lately. I am actually using my husband's now and have to get mine fix over the weekend. *haiz* Luckily I still have a couple of recipes in the flash drive that I can share with you all this week. Else I'll be MIA in the coming 2 weeks! Anyway, these 2 recipes are really easy to whip up and it actually took me less then 2 hours to get them on the table. First recipe is this delicious pumpkin soup that taste like from a fine dining restaurant but yet it can be so easily prepared at your own kitchen. Don't believe me? Just check it out for yourself:
Okay, maybe the presentation need some work, but I can guarantee you this soup taste really good. Don't like pumpkin? Don't fret, you won't feel like you're drinking pumpkin soup! I know most Asians don't usually fancy such thick, creamy soup since it doesn't go with the vegetables and dishes on the table. But having this soup occasionally on a lazy weekend, serving it with some salad or bruschetta is quite a delight too. :P
When I was in California, I made this so often since my husband and I love it very much. Plus having it during winter was so comforting! Downing it with some simple toast and we are already feasting, hahaha! This soup taste like restaurant gourmet soup that will surely impress your family and guests. But you will be surprise how simple the ingredients are involve, check it out:

Ingredients for Simple Gourmet Pumpkin Soup: (Serves 5-6) (adapted from Foodnetwork.coml)
1 tablespoons butter
1 large onion, diced
1 large carrots, peeled and diced
1 apple, peeled and diced
2 cups fresh pumpkin, roasted and diced

1/2 tsp dried thyme
1 bay leave (omit if not available)
2 cups chicken stock
1 cup fresh cream

Salt and freshly ground pepper

4 portabella, sliced
  • To roast the pumpkin, preheat the oven to 200C. Peel and dice the pumpkin and place on baking dish. Sprinkle salt and black pepper over the diced pumpkin and coat with some olive oil. Roast in the oven for 15 minutes till tender. Note that dice the pumpkin smaller to save roasting time.
  • In the meantime, heat up a large pot with the butter. Add in diced onions, apples and carrots. Stir and cook till slightly tender. Add in the dried thyme, bay leaf and the roasted pumpkin.
  • Continue to cook till mixture is slightly mushy. Add in the chicken stock and cream into it. Cook the mixture till just boil. Off the fire and let cool slightly.
  • Then remove the bay leave. Blend the mixture till creamy and return the mixture into the pot and heat up again, but no need to boil. Add salt and pepper to taste. (I only added pepper, the soup was already very flavorful!)
  • In a saute pan, heat a tsp of oil and saute the sliced portabella till soften and cooked. Sprinkle some black pepper and salt and garnish over the pumpkin soup if desired.

If you prefer a healthier version, you can choose to omit the cream. Else, live a little...pour on the cream and taste the heavenly creamy soup. ;))

Hope this soup will be served at your dinner table too. It's really a nice simple gourmet soup that is so easy to make. Try it and you will know how delicious this is. ;)

Still not used to this laptop, so will post the other recipe some other day.
Hope to see you folks soon.....cheers all!