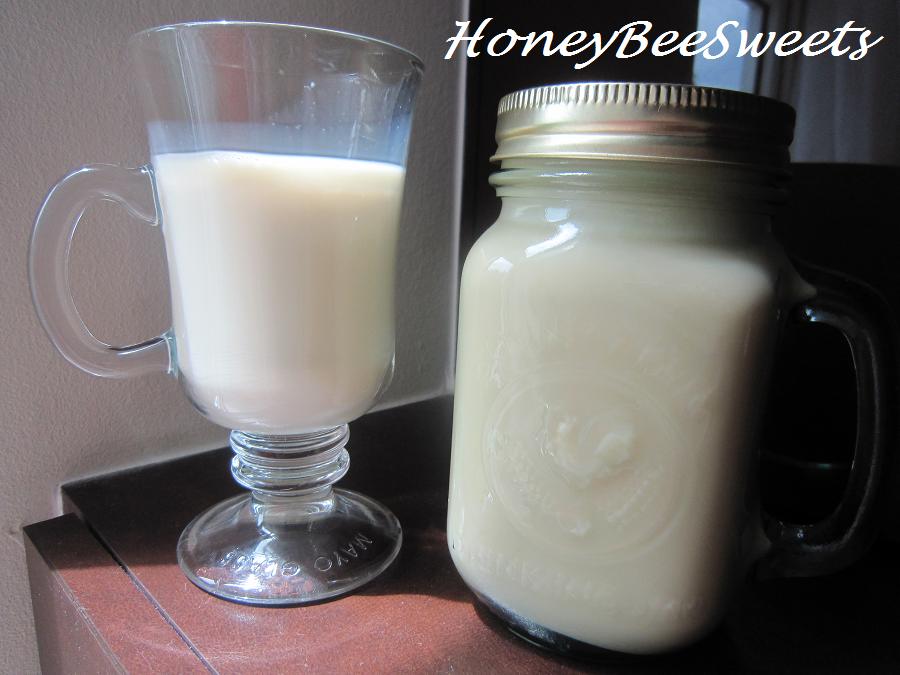
I have always wanted to make soy milk at home. Call me silly, but I always thought that it requires a soy milk machine or something to blend the milk out. Well, I was so wrong, lol! Great thing Wendy posted the recipe for making soy milk and the 'mystery' was gone, yippee!! It didn't take me long to buy a pack of soy beans and got to make fresh soy milk...at home! :) You must be thinking why bother with so much trouble if soy milk is so darn cheap outside. Well, it's hard to explain, but being able to make it yourself is fun! And furthermore, I know I am able to churn out more stuff with the soy milk later too. :)) Exciting!
  And after making the soy milk myself then I realize that it's so darn easy to make it!After tasting my homemade soy milk, I am hooked! Think I will never buy another box of soy milk at the grocer ever again, lol! Up from the point I knew how to make it, I've already done it thrice! Which is all within this month, lol! As tempted as I already am, I still did not make the tofu with the soy milk. Why...somehow I always have some store bought tofu / egg tofu in the fridge (I always have tofu in stock since my family love tofu) I guess that should be all the more reason I should make tofu at home. Well, perhaps next month another post yah?
Recipe adapted from Wendy's blogIngredients for Soy Milk: 150g soy beans 750ml water + 750ml water 2 to 3 knotted pandan leavesMethod:- Soak the soy beans overnight or at least 8hrs. Throw away the soaking water. Use your fingers to loosen the skin of the beans. Then using a sieve to scoop it out. If it doesn't bother you, you can skip the step of removing the skin. But it is known that the skin of the beans can cause joint pains.
- Put all the beans into a blender with 750ml water at high speed. Blend until very fine, for about 2 minutes.
- Pour the blended beans puree into a fine sieve bag and press to extract the soy milk into a pot.
- Place the soy mixture into the blender again and repeat the blending process with another 750ml water, then extract milk to the pot.
- Add a couple of knotted pandan leaves into the pot and start boiling the soy milk. Keep a watchful eye over it as it over boils and flows out very rapidly. Serve warm or chilled.

 Talking about bread, I bet those that follow my blog would not be surprise that I will make soy milk bread, lol! Being a soy milk fan, it does make sense to try out making bread from it. :)) Furthermore, I did see some bloggers out there already attempted that...so it should be pretty good. ;) Let me correct it...it's not good, it's great! Ingredients for Vegetarian Tang Zhong “湯種" Soy Milk Bread:
 Starter dough (“湯種"):250ml fresh soy milk (you can use store bought sugar free ones)50g cake flour
Main dough:
200g of starter dough
420g bread flour
80g wholemeal flour
1 tsp salt
1/2 tsp instant active yeast
45g caster sugar
240ml fresh soy milk (you can use store bought sugar free ones)
40g vegetable oil
30g butter @room temperature
Method:
- Mix all dough ingredients except for butter together in a large mixing bowl to form a soft dough. Place on work area to knead or mixer to do the kneading. Knead the dough till it is not sticky, about 20 minutes.
- Add the unsalted butter in and continue to knead till the dough is shiny and elastic. To test if the dough is ready, pull a small piece off and stretching it with your fingers. If dough is very elastic and pulls to almost see through without breaking, then it's done.
- Place dough in a greased bowl and cover with plastic wrap and allow to proof for at least 90 minutes to 2hrs.
- Once it's doubled, punched out the air and divide the dough to 65g portions, roll round and cover to let rest for 10 minutes before shaping.
- Fill the dough with any desired filling. Let proof for another 20 mins, brush with egg wash. Bake @ 175C in a preheated oven for 15 to 18minus till golden brown.

 A picture to show the softness of the soy milk buns. :)) What best is it's vegetarian and it's wholewheat too! Hope this post can get you really motivated to make some soy milk and breads at home. :) It's really worth every ounce of effort. :) I know for sure that I will be making more of these, perhaps trying out black beans next time, that would be really interesting! So stay tune folks!
Have a good week ahead all! Cheerios!

 It's Thanksgiving today! Well at least at the other side of the globe it still is. :) I can already imagine all my friends back in California gathering together for this wonderful holiday and feasting on all the delicious food. I do miss the nice warm feeling of this festive day, it reminds us how we should be thankful of what we have and cherish it wholeheartedly. I remember distinctively during Thanksgiving dinners, everyone at the dinner table will take turn to say thanks before we dive in to the feast in front of us. As boring as it is, I would always say the same old thing year after year, that is I am thankful for my husband and kids. But the truth is that is what I am really thankful for, lol! Have you given it a thought too, what are you thankful for?
I wanted to post something in regards to Thanksgiving, but after much pondering, I decided to just make with something that is in the season, pumpkin! No, not pumpkin pie or pumpkin bread. I made Steamed Pumpkin Kueh, "金瓜糕"...the Chinese way, lol!
Perhaps, just perhaps the Chinese will serve this during our version of Thanksgiving dinner, lol! And considering the nice golden pumpkin color in the kueh, it looks auspicious. ;)) Not only that, it taste really good too! If you are not a pumpkin person, no worries, there is actually little to no trace of pumpkin scent in it.
Recipe Adapted from "Delightful Snacks & Dim Sum' by Agnes Chang
Ingredients for Steamed Pumpkin Cake (makes 22cm square pan)
4tbsp oil 6 pips garlic, chopped
6 shallots, chopped
60g dried prawns, soaked and chopped
2 pairs Chinese sausages, diced
200g minced meat (I used pork), 6 tbsp oil
600g pumpkin flesh, uncooked and shredded
1 tbsp chicken stock granules (I added 1.5 tbsp)
Batter
300g rice flour
60g tapioca flour
1000ml (4 cups) water
1 tsp salt (I added 1.5 tsp)
1 tbsp sugar ( I added this since I like a hint of sweet)
1/2 tsp pepper
Method:
- Heat up oil, saute chopped garlic and shallots until fragrant. Add dried prawns and stir-fry until fragrant. Add Chinese sausages, minced meat and stir well till cooked.
- Mix in the pumpkin, chicken stock granules, batter and stir until thick. Taste and adjust as required.
- Dish the batter into 22cm (9") square tray and steam for 45 minutes with high heat until cooked. Remove and leave to cool before cutting into pieces.
- It can also be pan fried with a little oil until golden brown on both sides before serving.
 I pan fried the remaining half the next day and it was delicious! I love the crispy outside and the creamy, flavorful inside! The Chinese sausages gave some extra texture and taste, love it! In fact I am going to make this again over the weekend because my kids loved it very much and has been asking for it again. :)
Shall keep this post a short one today. Hope you guys will give this recipe a try, it's yummy! Lastly, wishing everyone out there a very Happy Thanksgiving! And remember to snatch up more stuff during the Black Friday sale!! Have a super weekend all!!


 I have always wanted to make soy milk at home. Call me silly, but I always thought that it requires a soy milk machine or something to blend the milk out. Well, I was so wrong, lol! Great thing Wendy posted the recipe for making soy milk and the 'mystery' was gone, yippee!! It didn't take me long to buy a pack of soy beans and got to make fresh soy milk...at home! :) You must be thinking why bother with so much trouble if soy milk is so darn cheap outside. Well, it's hard to explain, but being able to make it yourself is fun! And furthermore, I know I am able to churn out more stuff with the soy milk later too. :)) Exciting!
 And after making the soy milk myself then I realize that it's so darn easy to make it!After tasting my homemade soy milk, I am hooked! Think I will never buy another box of soy milk at the grocer ever again, lol! Up from the point I knew how to make it, I've already done it thrice! Which is all within this month, lol! As tempted as I already am, I still did not make the tofu with the soy milk. Why...somehow I always have some store bought tofu / egg tofu in the fridge (I always have tofu in stock since my family love tofu) I guess that should be all the more reason I should make tofu at home. Well, perhaps next month another post yah?
 Talking about bread, I bet those that follow my blog would not be surprise that I will make soy milk bread, lol! Being a soy milk fan, it does make sense to try out making bread from it. :)) Furthermore, I did see some bloggers out there already attempted that...so it should be pretty good. ;) Let me correct it...it's not good, it's great!



 A picture to show the softness of the soy milk buns. :)) What best is it's vegetarian and it's wholewheat too! Hope this post can get you really motivated to make some soy milk and breads at home. :) It's really worth every ounce of effort. :) I know for sure that I will be making more of these, perhaps trying out black beans next time, that would be really interesting! So stay tune folks!