
Hi all, hope everyone is enjoying their holiday today, especially our Muslim friends. I want to wish them Selamat Hari Raya Aidilfitri! I too had a great day today, been spending some quality time with my dear family. Best of all, we went over to my mum's house for another nice gathering with lots of good food! :) Goes without saying, I baked something for desert for the family. This time I decided to make use of the stone fruits in season and baked a Plum and Almond Frangipane Tart.
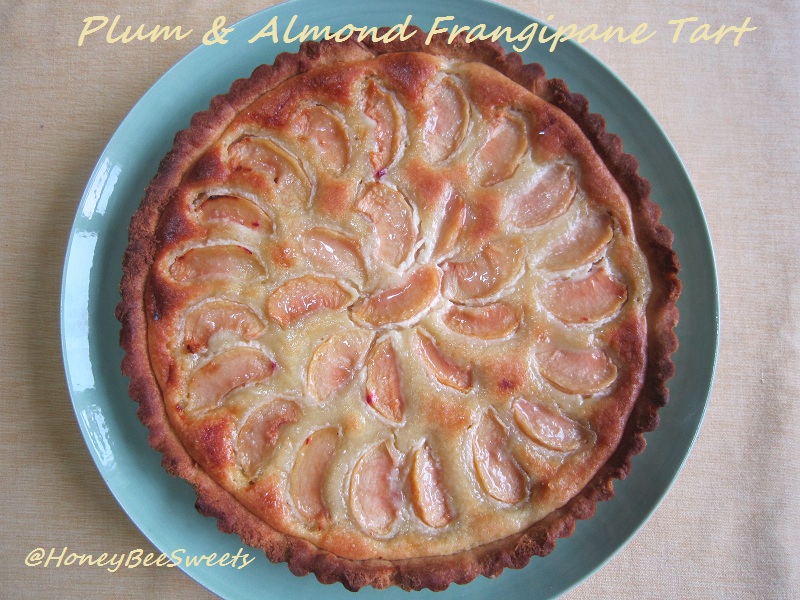
Frangipane is a mixture of ground almonds, sugar, eggs and butter, baked into a soft, macaroon-like layer. In this recipe, it's incorporated into this summertime fruit tart. I got this lovely recipe again from "Essentials of Baking" from William Sonoma. The only down side was I couldn't find French prune plums(stated in recipe) which was ruby red in flesh. And thus the tart didn't turned out as pretty as I hoped it will be since I was using Californian Santa Rosa Plums which has amber colored flesh. Looked kind of pale if you ask me. ;P But on the good side, it was surprisingly sweet! *phew*

Frankly speaking, I didn't do a good job on my baking...as you can see the crust looks too" toasty" on the sides. *sigh* The mistake was while doing the pre-blind baking for the tart shell, I got a little worried that the base won't be done, so went for an additional 2 minutes. And see what that extra 2 minutes can do?! Lesson learned; Never try to be too smart and over bake your pastry shell.
Ingredients for Plum & Almond Frangipane Tart: (makes a 9 or 10" tart pan)
Ingredients for Rich Tart Pastry:
210g all purpose flour
60g confectioner's sugar
1/4 tsp salt
125g cold unsalted butter, cut into small pieces
2 large egg yolks
1 tbsp heavy (double) cream (I omitted this)
In a bowl, combine flour, sugar and salt together. Scatter the butter pieces into the flour mixture and knead with your finger tips or pastry knife to combine everything till it resembles bread crumbs. Add in the double egg yolks and continue to knead till to comes together to form a soft pliable dough. Wrap in plastic and chill for 30 minutes.
Ingredients for Filling:
170g blanched almonds
155g + 1 tbsp caster sugar (I reduced to 140g)
1/4 tsp salt
1 tsp pure vanilla extract
1/2 tsp almond extract ( I omitted this)
1 large egg
60g unsalted butter, room temperature
8 ripe plums, peeled, pitted and sliced in 8 equal wedges
Method:
- Preheat the oven to 200C and grease a 9 or 10" tart pan with a removable base.
- Remove the chilled pastry dough from the fridge and lightly flour the work surface. Roll out the dough to about 12" in diameter.
- Gently transfer the rolled out dough with the help of the rolling pin on to the greased tart pan. Gently press in the pastry at the edges and scrap away any excess dough.
- Place a large aluminum enough to cover the tart over and gently press in the sides. Put some baking weight over the foil. Bake the tart shell for 13 to 15 minutes. Remove the baking weight and aluminum foil and bake for another 2 minutes to dry up the tart base. Remove from oven and let cool till needed.
- Preheat the oven to 180C.
- Meanwhile, make the filling: In a food processor, process the blanch almonds and the sugar till finely ground. Add salt, vanilla extract, almond extract if using and egg. Process the mixture till well blended. Add in the softened butter and processed until smooth. .
- Using the rubber spatula, scrap the mixture into the tart shell and spread it out evenly.
- Arrange the sliced plums in 2 circular rows on top of the frangipane mixture. Sprinkle that 1 tbsp sugar if desired. I omitted this and glaze the tart with warm jam after it's been baked.
- Bake in the preheated oven for 30 to 35 minutes till the frangipane is golden and set. Transfer on to cooling rack and serve at room temperature or refrigerate and serve cold.

This fruit tart may seem sophisticated or complicated to bake, but on the contrary, it's not. :) Plus both the pastry dough and frangipane filling can be made in advance prior to the day of baking. So serving this at a dinner party will surely impress your loved ones especially when it seems like effortless to bake it. You can also replace the plums with any kind of stone fruit like nectarines, peaches or even Granny Smith apples would be nice. :)

Believe or not, but the above portion was the only slice that I managed to salvage back home after the gathering. Although it was slightly on the sweeter side (filling sugar can reduce by another 15g), it still turned out delicious. The pastry shell was buttery and nice, while the filling was both nutty, sweet and creamy which went real well with the slightly tart plums. My niece liked it so much that she had 2 big slices, heehee.
Will again be submitting this to Aspiring Bakers #10: Easy As Pie ( August 2011) hosted by Janine of Not The Kitchen Sink!
Wishing everyone a good good day today, tomorrow and day after! Cheers!


