Showing posts with label banana. Show all posts

Friday, May 8, 2015

Banana Coconut Cream Chiffon

There is an endless possible combinations as to what kind of flavours you can come up with on creating your cakes. Just looking at those cakes selling at cafes and bakeries nowadays, some flavours can get really exotic, like candied bacon, chocolate chilli and even my recent attempt of Mango Sticky Rice cupcakes. :D 

Today I am sharing with you guys yet another new creation from,...ahem me again. :P Well, eating the same stuff for too many times can get a little boring. Just a little twist and tadah! A whole new world...I mean cake! This time, my chiffon is ....~drum roll~ ... Banana Coconut Cream Chiffon!
Who would have known...two really aromatic ingredients coming together and making another awesome end product...yum. I was really pleased that this chiffon turned out so well, even my two little "critics" said "It so good Mum!". And that made me decide I should blog this recipe...yeah, I'm quite easy to convince. :P Anyway...the ingredients are real simple, pretty much what you can find in your pantry.

Ingredients for Banana Coconut Cream Chiffon (Makes a 21cm / 22cm tube pan)
 
130g cake flour
5 egg yolks
90g caster sugar
100ml coconut cream (not coconut milk, it needs to be thick)
40ml organic coconut oil
1/2 tsp salt
2 medium-large ripe bananas, peeled and mashed

5 egg whites
50g caster sugar
  • Prepare two large mixing bowls. One to contain the egg yolks and one for the whites.

  •  I usually use my KA to beat the whites, while I will mix the egg yolk mixture by hand.
  • Add the 90g caster sugar to the egg yolks and beat the mixture. It should look like this:
  •  To speed up the process, beat the mixture over a double boiler. Making sure the bottom of the mixing bowl is not touching the hot water. And the water should be barely simmering.

  •  Continue to beat the egg yolk mixture by hand until it becomes thicker, doubled in volume and lighter in colour. You can see the colour difference with these two photos. ;)
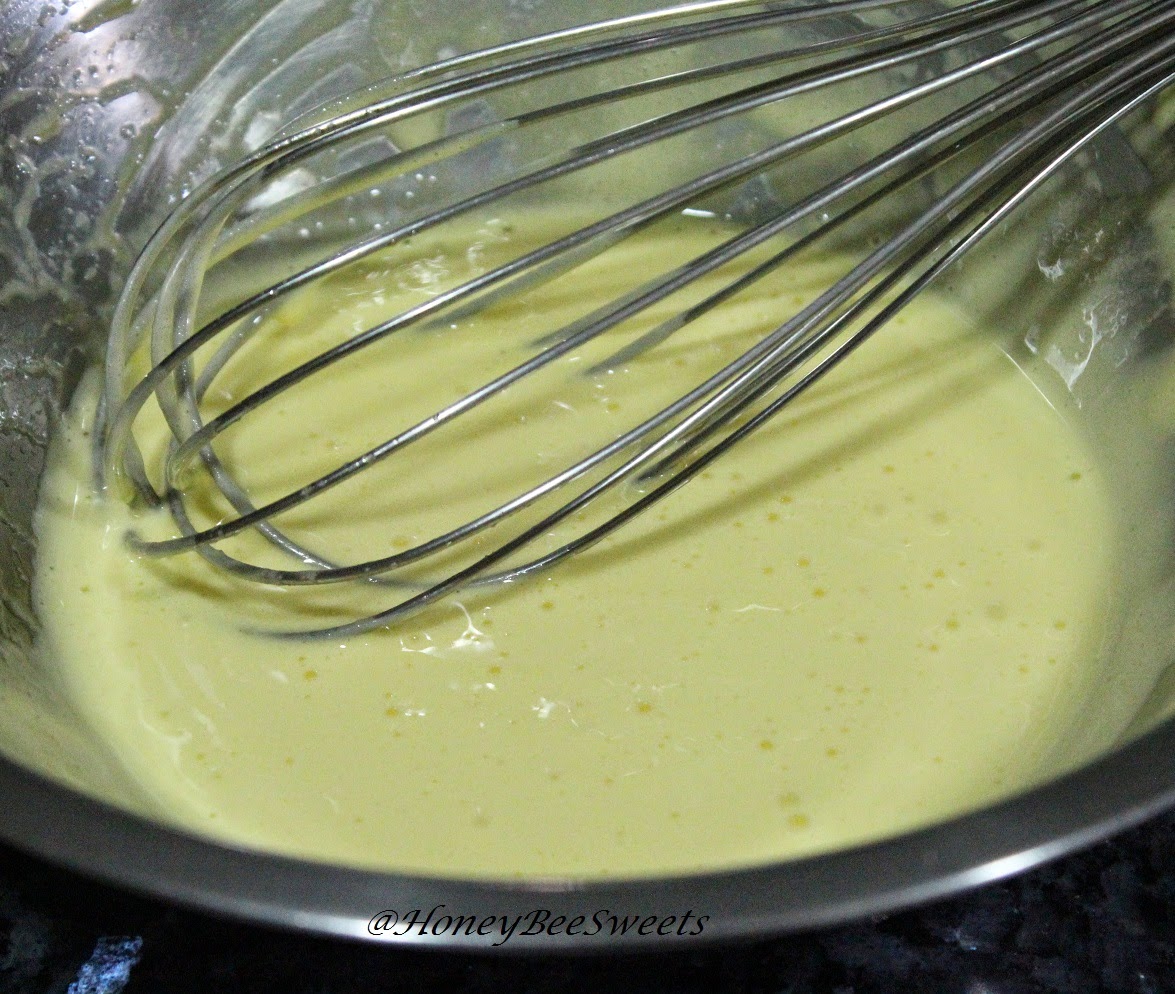
  •   Next add in the coconut cream and coconut oil. Mix well.

  •  Mix well till well combined. Next you add in the mashed banana and vanilla essence. Again mix well. Lastly, sift in the flour and mix well. 
  • In the meantime, preheat the oven to 170C and prepare a 21 or 22cm tube pan.
  • Now you beat the egg whites with the remaining 50g caster sugar. Beat till stiff peaks.

  •  In 3 separate portions, gently fold in the egg white mixture into the egg yolk mixture till all is combined.
  • Pour the batter into the tube pan.

  •  Now you need to do that all important step. Insert a tooth pick and give the batter a few good swirls to rib of any big bubbles inside.
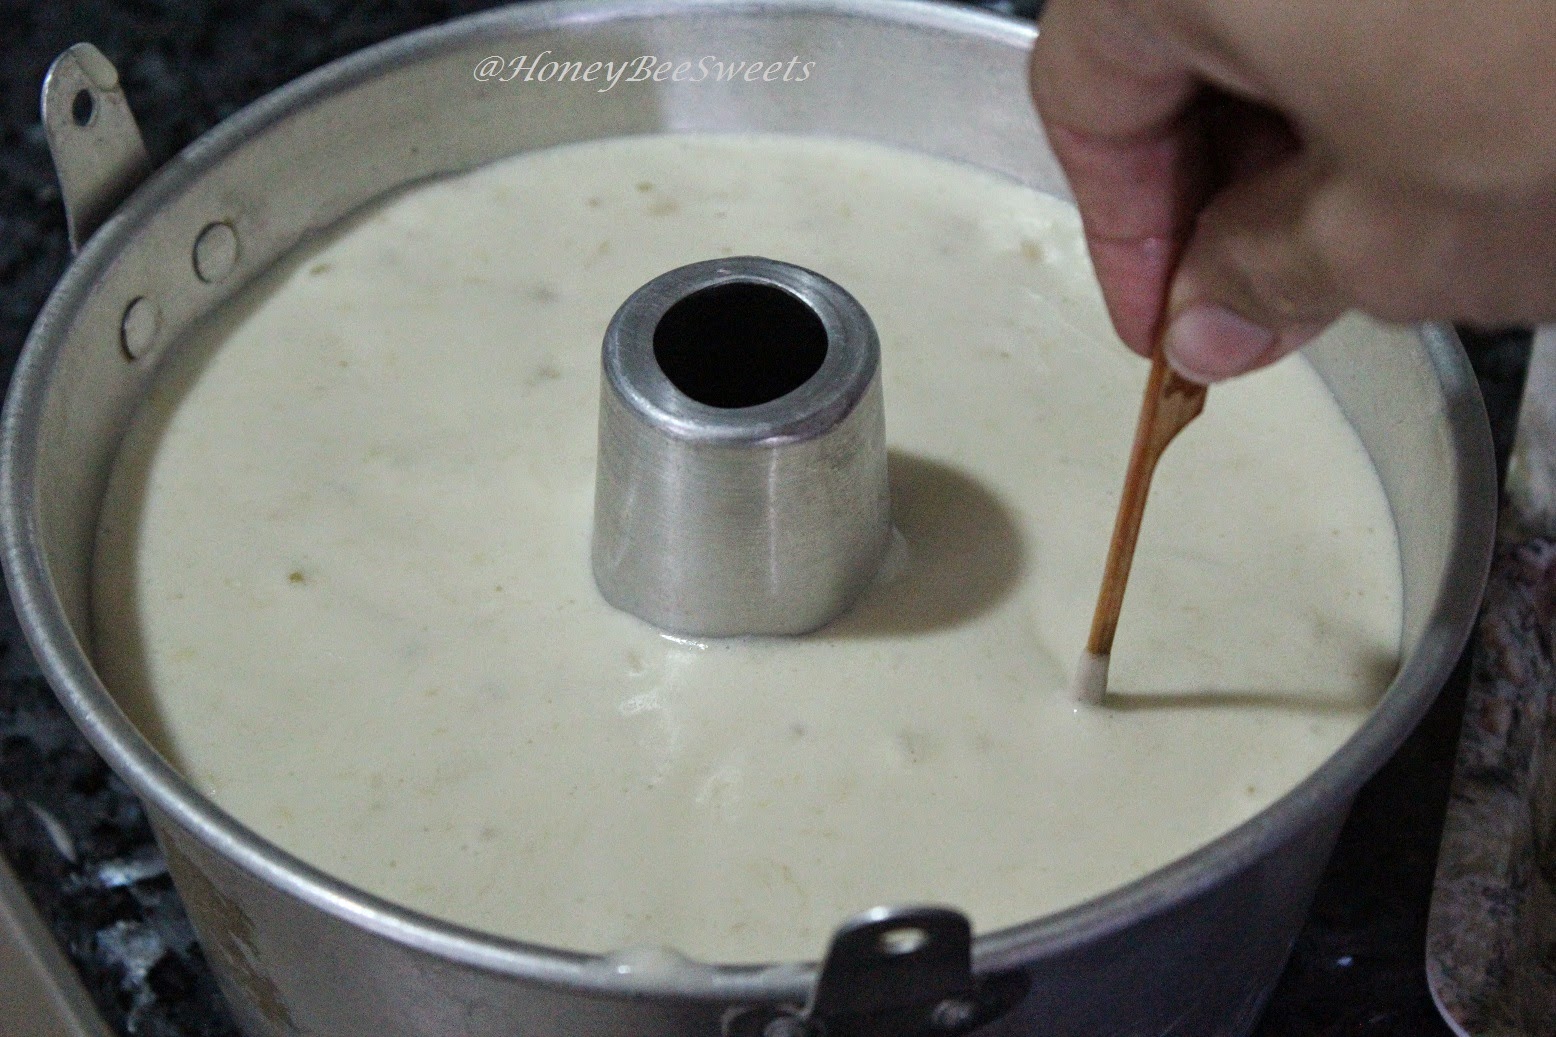
  •  Bake in the preheated oven for 28-30 minutes or till the tester comes out clean.
  • Once bakes, remove the pan and invert the pan to cool completely before removing it from the pan. This is crucial, make sure you let it cool completely before putting it back up right.
 While the cake was out to cool, my house was like super aromatic! I have to admit the coconut cream and oil was the key to make this cake so fragrant. :9
The texture was really good too. Not mushy feel, fine texture and light with evident banana and coconut flavor in each bite. So much love. :9 Would totally use this as a cake base too next time. ;)

Do try this out next time instead of just your usual banana flavored chiffon. Add a little of the coconut goodness and make it just a little special and most importantly tastier, I guarantee. ;)
  
Have fun baking and good luck to all the kiddos that are having exam these few days!


Friday, January 2, 2015

Buttermilk Cake with Banana and Salted Caramels

Yes, my first post of 2015! I have to remind myself that I need to keep this blog going, no matter how busy I am. :P So let's baking ya? And since I have a small pocket of time when my kids were in school (first day today, I decided to bake a cake. A simple cake, yet tasty, familiar and comforting.  Buttermilk Cake with Banana and Salted Caramel...that should fit the bill ya? 
Soft moist cake topped with caramelized banana slices and salted caramel chunks :9 Okay...the salted caramel chunks kind of sunk in ...haiz :P But it's all good when you bite into the cake...salty sweet gooey goodness, yum! Now the recipe...

Recipe for Buttermilk cake with Banana and Salted Caramels (makes 8x8")
For the Salted Caramel (recipe adapted from Smitten Kitchen)
125g granulated sugar
56g unsalted butter
1/4 tsp sea salt flakes
3 tbsp heavy cream
  • Prepare a shallow bowl with a piece of parchment over it and lightly greased with butter.
  • To make the caramel, use a heavy saucepan for it. Add in the sugar and 2 tbsp water over medium heat.
  • Give the saucepan a good swirl to make sure all the sugar is wet and melting. Let it slowly boil till it reaches a golden colour. Remove from fire and continue to swirl it...it should still continue to darken a little to a copper colour.
  • Add in the butter gently as it will bubble. Swirl and let it melt down.
  •  
     
  • Next add in the sea salt.
  •    
  • And lastly add in the heavy cream and stir in well. Return the saucepan over the stove at low fire and let it slow boil till it gets thicker and darker in colour.
  • Pour the hot caramel on the greased parchment and let it cool completely. (Cool to the touch)
  •  
  • Then chill it in the fridge for at least an hour before use.
For the Buttermilk Cake
115g unsalted butter, room temperature
180g light brown sugar
2 large eggs
1 tsp pure vanilla extract
 250g cake flour
1 tsp baking powder
1/4 tsp baking soda
1/4 tsp salt

*200ml buttermilk, shaken
2 large bananas, cut length wise and slit to halves 

* I used store bought buttermilk because I feel the buttermilk was creamier and more buttery in smell as compared to making my own using milk and lemon. But by all means, use 200ml to 1 tsp fresh lemon juice if you have not buttermilk available.
  • Preheat the oven to 180C and grease a 8x8" square pan, lined with parchment and again grease it with butter.
  • In a large mixing bowl, add in the butter and sugar. Beat it till light and fluffy, about 5-8 minutes at medium speed.
  • Next add in the eggs, cracking in one at a time and mix after each addition. Then add in the vanilla extract and mix again.
  •  
  • Sift in a bowl the cake flour, baking powder, baking soda and salt.
  • Add in 1/2 of the cake flour mixture into the egg mixture and mix well.
  • Add in all the butter milk and mix well again
  • Lastly add the remaining 1/2 of the flour mixture and mix till all is well incorporated. 
  • Pour the batter into the prepared  bake pan and smooth it out with a spatula.
  • Now you line the sliced bananas neatly over the cake.
  • Next you take the caramel from the fridge and make sure that it is solidified enough to be handled.
  • Next you snip the caramel into small squares which you can put onto the cake.
  • You then place the salted caramel chunks on to the cake as well...not on the banana...you will know why later. :)
  • The caramel might be a little soft, but it is ok...just work fast. :) 
  •  Last step is to sprinkle some granulated sugar over the banana surface so that it will caramelized. But this step is totally optional if you prefer yours to be less sweet. :)

  • Once you have added all the salted caramel chunks, put the pan in the oven to bake.
  • Bake for 40 -45minutes till the tester comes out clean.
I cannot begin to tell you how awesome my kitchen smells when this cake was baking in the oven. I was drooling the whole time hahaha! That banana, caramel and creamy buttermilk combo was perfect!
As you can see that soft moist texture of the cake...so yum! And that tender sweet banana plus deep dark caramel at the bottom (Unfortunately :P) is just heavenly in each bite. :9 Next time I bake this, I will try to make sure my salted caramel chunks are harder...so it won't be sinking way down. :P


Anyway, next time you have ripe bananas hanging around in the house...why not give this recipe a try. :) I am sure it will not only impress you, it will make you want to share it with everyone. Ahem...show off heehee. :P


Okay guys, signing off now, it has been quite a long day
Till the next time...have an awesome weekend!


Tuesday, July 30, 2013

Steamed Moist Chocolate Oat cake with Bananas

This is a long over due post! Haha, my sincere apologies again. :P I guess I am posting upon on demand now since I can see my followers' interest are. Well mainly from Instagram though since that is where I am most of the time now. :P Anyways, I am gonna post one of the more popular recipes today which I have repetitive requests on. It is Steamed Moist Chocolate Oat cake (with banana). I actually first made this for Easter...yeah 3 months late, hahaha! Oops busted! LOL!

This is such an easy recipe to whip up! I guess the only tedious part is the blending the rolled oats and steaming the batter, haha! Anyways, I adapted this recipe from Cooking Crave but modified the recipe to a healthier version. Here is my recipe:

Ingredients for Steamed Moist Chocolate Oat Cake (makes about 12 standard 4oz)
120ml vegetable oil
200ml chocolate milk (low fat milk can be used)
2 large eggs
1/4 tsp salt
150g light brown sugar (I used 140g when I added banana in)
80g cake flour
50g oat flour (blend rolled oats till very fine)
50g unsweetened cocoa powder (I used Valrohna) 
1/2 tsp baking powder
1/4 tsp baking soda
1 tsp pure vanilla extract
4 ripe bananas, half or quartered to be inserted into cake
  • Get ready steamer with cupcake liners or an 8" round cake pan, greased and lined with parchment paper. Set the steamer on low fire
  • In a large mixing bowl, add oil, milk, eggs, salt and sugar. Stir well and make sure sugar has dissolved. You can speed up the process by placing bowl over double boiler.
  • Sift the cake flour, cocoa powder, baking powder and baking soda into the milk mixture. aAdd in the oat flour at this point. Stir well making sure everything is combined and no visible lumps.
  • Lastly add in the vanilla extract and mix. Batter will be runny.
  • Pour the batter into the prepared containers. If adding bananas, now you can insert them, letting them stand up right. 
  • Make sure when you place the batter into the steamer, it is already on low boil. For a whole 8" cake, steam at medium fire for 40mins till cake tester comes out clean. For cupcakes, steam for 10-12 mins till cake tester comes out clean as well.
The addition of oats did not compromise the taste nor much of its soft texture. And with the bananas, you can opt to not add more sugar as it will enhance the sweetness when you bite into the fruit. Yums!
Showing off the moist tender interior of the yummy healthy, yes healthy cake. :D Love the addition of the banana...really makes this cake a whole lot more enjoyable haha!

Okay, that's all for now folks, will post up something savory next, stay tune!
 

Wednesday, February 27, 2013

Kumquat & Banana Chocolate Chip Ogura Cake

Okay, don't ask me why but I also can't believe I am so hardworking myself, lol! Up with another post on the following day!? Gee...haven't done that for ages! And because Jessie left a comment "motivating" me to post up, I decided to heed her "advice", haha! Thanks Jessie! Plus my hubby is out with friends tonight...so can lah, hahaha! Sound like I'm cheating!! Lol! Shhhhh! 

Okay, today's recipe is another classic, it's none other then the Ogura cake (a.k.a. 相思蛋糕). I posted 2 different flavors before, namely Pandan and chocolate. Today, it'll be Kumquat flavor with chocolate Swiss meringue (in lieu of CNY, haha) and Banana with mini chocolate chip (my kids' favorite!).
It was quite awhile since I last baked an Ogura cake...forgotten how moist and soft it taste. :)) I was inspired by Cathy after she baked her Passion fruit version quite awhile back.

Ingredients
(A):
100g egg yolks
1 whole egg
1/4 tsp salt
60g vegetable oil
80g kumquat marmalade (pls refer to Wendy's recipe for detail, I used hers)

(B)80g cake flour, sifted

(C)
200g egg whites
55g sugar

Chocolate Swiss Meringue Buttercream: (Optional if you like cake plain)

75g chopped dark chocolate

300g Swiss Meringue Buttercream


Melt the chocolate in the microwave and let cool for a minute before mixing into the room temperature buttercream. 

Method: 
  • Whisk ingredients (A) together in a mixing bowl. Add in (B). Set aside.
  • Whisk egg whites until frothy & add in sugar. Continue to whisk until soft peaks. 
  • Gently fold in the whites into (1). Pour into prepared pan and sprinkle chocolate chips over the top. 
  • Steam bake in a preheated oven @ 150 degrees for 40mins.
  • Once tester comes out clean, remove from oven and let cool completely.
  • Slice the cake into 2 and spread the chocolate swiss meringue buttercream in between.
I'll let the picture do the talking....nom nom nom! Hahaha! Everyone that has tasted the cake all raved how good it was....*happiness*! I guess orangy citrus taste plus chocolate is a sure win situation! :P
You can opt not to spread any buttercream but I like mine with it since I'm all for buttery taste, lol! I also made kumquat compte, which in fact can be made in to the marmalade by just blending it. :)) Thanks Wendy! *muahs* lol!

The other Ogura cake is Banana flavor with mini chocolate chip. At first I was hesitant to post this but since my kids love this so much, I figured why not just share with everyone then. :))
This is another fabulous combo, banana and chocolate, you can't go wrong with it! I actually regretted not sprinkling more chocolate chips!!! Lol!
The recipe is very similar to the one above, will post ingredients needed but please refer to above the method, heehee.

Ingredients
(A):
100g egg yolks
1 whole egg
1/4 tsp salt
60g vegetable oil
2 large ripe bananas, peeled and mashed

(B)80g cake flour, sifted

(C)
200g egg whites
65g sugar 

Mini Chocolate chips

Note: Sprinkle the chocolate chips over the batter right before you place into the oven to bake.

Nice right, hahaha! Do try it out yourself, guarantee satisfaction! 

I am submitting these 2 lovely cakes to Sonia's blog event :Chinese New Year Delights 2013 新春送礼.

Okay folks! Will go hibernate another 2 more weeks now, hahaha, just kidding! 
Have a good evening all! Cheers