Thursday, April 19, 2012

Dreamy Cranberry Cream Scones

The weekend is just around the corner. I am really looking forward to it as I have some nice programs lined up. But other then that, my usual weekend morning is to wake up a little earlier, to whip up a delicious breakfast for my family. I bet most of us are tired of eating breads or cereal every morning, so a change of menu would be a nice treat. Today I have a fabulous recipe that you can make for your love ones. It is a really nice and simple scone recipe that I am sure anyone can whip up; Cranberry Cream Scones.
These scones might look ordinary, but they are actually very good and quite addictive to eat. ;) I got the recipe from one of my favourite cookbook "The America's Test Kitchen : Family Baking Book". It was really easy to whip up and you can even prep the dough the night before, store in fridge and just pop it in the oven to bake the following morning, easy! I too saw this recipe on Smitten Kitchen too and was really sure this recipe rocks! (^o^)
If you don't have cranberries at home, you can simply replace it with raisins or even chocolate chips. :) Here is the recipe, with slight modifications:

Ingredients for Cranberry Cream Scones:
240g all purpose flour
3 tbsp caster sugar (I used 30g confectioner's sugar)
1 tbsp baking powder
1/2 tsp salt
72g unsalted butter, cubed and chilled
1/2 cup cranberries/ raisins/ chocolate chips
240ml dairy heavy cream (I used 180ml cream + 60g sour cream)
  • In the electric mixer bowl, sift in the flour, baking powder, confectioner's sugar and salt. Then add in the cold cubed butter and beat the mixture with the flat beater till it resembles bread crumbs.
  • Then pour in the cream and sour cream to the butter mixture. Then gently fold in till the dough comes together. Bear in mind that you do not over mix it.
  • Turn the dough and any floury bits onto a floured counter and knead till it forms a rough and slightly sticky dough call. Then flatten the dough into 1 inch thick. lightly dust the surface
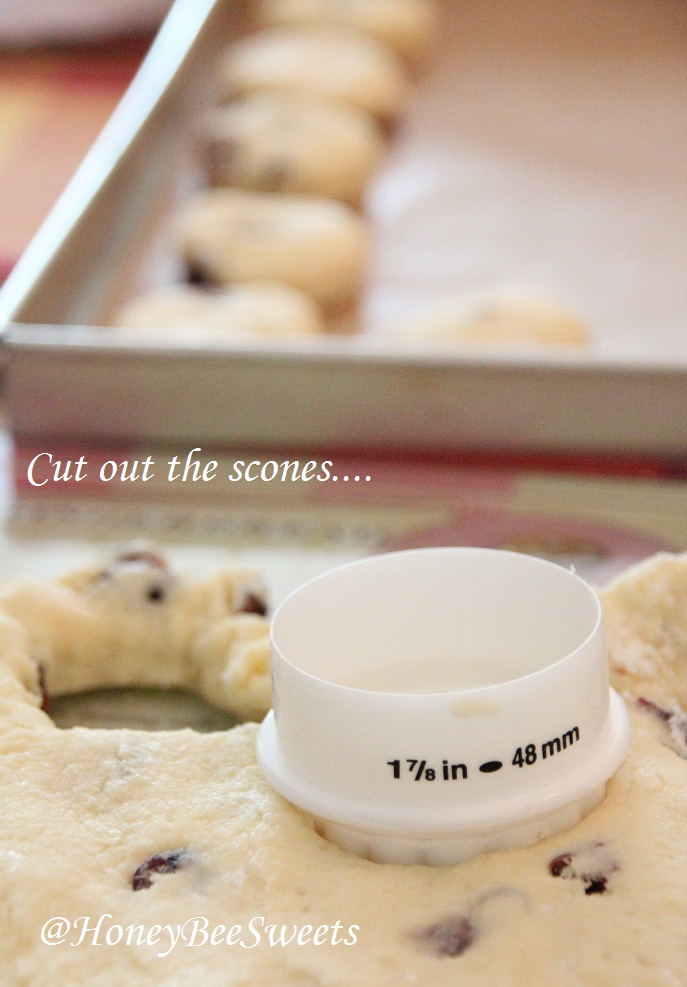
  • Use a 2" round cutter (Mine is a 1 7/8", odd size I know) or any size you fancy, dip the cutter in some flour and cut out the rounds. Placed the cut out doughs on a baking tray lined with parchment paper. Repeat till all the dough has been cut out.
  • Preheat the oven to 210C.
  • You can either bake the scones or chill it overnight and bake it in the next morning. If you are baking now, brush the scone tops with cream and sprinkle some coarse sugar on top.
  • Then place them in the preheated oven and bake for 12 to 15 minutes till they are light golden brown. Remove from oven and let cool on rack before serving.
I actually doubled the recipe and brought it to my daughter's school for a special breakfast event. The teachers and girls loved it and so did I! Those that tasted it, all claim it's really good. Even my MIL whom is not familiar what a scones is, said it's very tasty. ;)
This scone recipe is going into my favourite bake list. It's light and flavorful and the slight tang from the cranberries is a great contrast. Even though I replaced some of the cream with sour cream, the taste is still fantastic. But feel free to use all the cream in the recipe, I'm sure it's even more heavenly...well if you don't mind the calories, heehee. :P


Okay, signing off now, have a great weekend folks!

Monday, April 16, 2012

Heavenly Egg-less Tiramisu

Ah yes, Tiramisu, a wonderful cake that I always enjoy and yet has this "fear" of attempting it myself. Somehow, it seems complicated with all that cheese layering and sponge fingers plus alcohol. Furthermore, with 2 young kids at home, raw eggs, coffee and alcohol just doesn't seem appropriate. Not to mention I ain't a fan of sponge fingers. :P However, when I saw Sonia's post a while back which redirected me to the recipe posted in RasaMalaysia, my perceptive of the cake changed.
My Tiramisu cake recipe is adapted from Terri of Hunger Hunger who guest posted her recipe in RasaMalaysia. As I read through the recipe, I grew a little more confident that I can make this! And I'm so glad I did! (^o^) The fact that it doesn't use raw eggs was already good enough for me, heehee. Thanks Terri!
Here is the recipe, slightly modified:

Ingredients for Egg-less Tiramisu (makes an 6"x7" rectangle):
2 cups (500 gm) mascarpone cheese
1 1/4 cup heavy cream (1/2 cup + 3/4 cup)

1/2 cup (about 100 gm) semi-sweet dark chocolate
1/3 cup strong espresso (I used Nescafe instead)
3 Tbsp coffee liqueur such as Tia Maria or Kahlua
4 slices of 6" by 7" of sponge cake (you can use similar or close to sizes)
8 tbsp confectioner's sugar (sifted) (5 tbsp + 3 tbsp)

Garnish: chocolate shavings
  • Mix the coffee/espresso with the coffee liqueur; chill.
  • Melt the chocolate with 1/2 cup cream over a double boiler; cool.
  • Whip the remaining 3/4 cup of heavy cream and 3 tbsp of confectioner's sugar till stiff peaks.
  • Whip the mascarpone and the 5 tbsp confectioner's sugar together till creamy, about 1 minute.
  • Fold the whipped cream gently into the mascarpone cheese. Chill mixture in fridge for at least an hour before use.
  • Lay a slice of the sponge cake on a serving plate, spoon about 1/4 of the espresso mixture over the fingers to soak. Spread 1/4 of the chocolate ganache over the cake and then spread 1/4 of the mascarpone mixture over. Repeat and end with a layer of mascarpone.
  • Garnish with choc shavings. Chill overnight or at least 8 hours.
*For sponge cake recipe, please refer to here but omit the extra flavoring to get plain vanilla.
Oh this cake is indeed heavenly~! \(^o^)/ The sponge cake was all soaked with the coffee mixture and the mascarpone cheese was really nice and light, making every bite melt in your mouth ever so easily. The chocolate ganache went really well with the coffee scent, a combination that anyone would easily fall in love with. And I was glad I went with the chocolate shavings instead of the cocoa powder as the garnish since I don't really fancy the chalky and bitter taste of the cocoa powder itself. Ehhh...but I'm so bad with my chocolate shavings, instead of nice curls, it looks more like broken wood chips. (-_-")

It's funny, but just as I was thinking about posting my tiramisu cake, I saw Wendy's post this afternoon. I was thinking like "Wow, what a coincidence! We baked the same cake at the same time!" But after reading her post, I realized that hers was done a year back and only got to post it now, heehee. Well, I guess the more the merrier right? So many varieties and all so good...yum! Hope you all will join in the tiramisu "craze" too! Happy baking all!

I am going to submit this post to this month's Aspiring Bakers #18 Layers of Love (April 2012) hosted by Sweet Samsations

Have a great week ahead all

Wednesday, April 11, 2012

Tender Stewed Pork with Whole wheat Buns (香嫩卤扣肉和全麦刈包)

Today's recipe is probably one of those that most of us have a "love-hate" relationship with. What is it? It's Stewed Pork sandwiched in steam buns(卤扣肉和刈包) or what the Hokkiens normally call "Kong Ba Bao". Why "love-hate"? Love is obvious, it is so sinfully GOOD, tender juicy pork that has been stewed over low fire for long hours, soaked it its favorable fat & gravy. Yummy! Hate? Well, it's kind of obvious too isn't it? I guess for me is that I always hate myself for chomping down all those fatty meats knowing that it ain't that good for the body. But life is too short to worry so much...at least for now, lol! So eat first and worry later ya?

Okay, if you have noticed, I made whole wheat buns instead to lessen the guilt, hahaha! The stewed pork recipe was actually from my mum whom has even took the trouble to buy the pork for me that morning. Thanks MUM! She went through with me step by step on how to cook the pork, so I tried my best to replicate her wonderful recipe at my very own home for the first time. :)
If you are interested to try this recipe out, read on:

Ingredients for Tender Stewed Pork(香嫩卤扣肉):
~1.5kg of Pork, the part which includes skin, a thin layer of fat plus lean meat (扣肉)
8-10 dried shitake mushrooms, soaked and rehydrate till soft, stems removed
8-10 cloves of garlic
8-10 cloves of shallot
8-10 slices of ginger
1/2 tsp five spice powder
2 star anise
1 cinnamon stick
4 to 5 tbsp quality dark soy sauce
2 tbsp sugar
salt and pepper to taste
  • First, par-boil the pork with some boiling water. Throw away water and dab dry the pork after it cool down a little.
  • Season the pork with about 1 tsp of salt. Then prick the skin with a toothpick several times. Then place the pork together with 3 to 4 pieces each of ginger and garlic in a pot, add just enough water to cover the pork. Slowly boil at low heat for a good 12-15 minutes till the pork is cooked through.
  • Remove the pork and retain the soup for later use. Let the pork cool down and pat dry. Then slice the pork in to wedges that is about the size to go with the buns. Set aside.
  • In a larger pot, add a tsp of cooking oil and heat up. Add remaining garlic, ginger and shallots into it and stir dry for a minute. Then add in mushrooms, cinnamon stick and star anise and continue to stir fry till fragrant, about 2-3 minutes. Now add the pork slices and stir dry for a couple minutes.
 
  • Add the reserved soup to the pot, follow by the dark soy sauce, five spice and sugar. Cover and let it boil. Once it reached boiling, lower the heat to simmer and let it slowly stew for 2 to 2.5 hours(yes, it's that long). Or if you have a pressure cooker, it should be much faster. :)
Isn't this a picture of beauty! Lol! Well at least it is to me. ;)) While the meat is stewing, you can make the whole wheat buns. Here is the recipe which I adapted from Carol's site: 全麦刈包:
Ingredients for whole wheat paus (全麦刈包): (makes about 12 to 14)
250g all purpose flour (I used pau flour)
50g whole wheat flour (I used Prima's whole wheat meal)
1 whole egg
130ml water
1/2 tsp instant dry yeast
15g caster sugar
20g olive oil
1/8 tsp salt
  • In a stand mixer bowl, add all ingredients and mix well to form a soft pliable dough. Then continue to knead till not sticky, about 8-10 minutes. The dough will be elastic and bouncy, but there is no need to knead till window panel stage.
  • Cover and let proof till it doubles in size. The punch out air and divide the dough into 40g each portions. Roll round and cover to rest for 10 minutes before shaping them.
  • Take a portion and roll into a flat oval, brush with olive oil (I used water) on the surface and fold into half. Place in on a piece of grease paper and let it proof for 30 minutes in the cold steamer. Repeat with all the rest of the dough portions.
  • After 20 minutes, start the steamer fire at medium to low heat. Steam for approximately 7-8 minutes then off the fire without removing the cover. Let it sit for 3 minutes. Then after 3 minutes, partially open the cover and let the paus cool slightly before removing them from the steamer.
These "fat lips" may be made from whole wheat, but they are still fluffy and soft. At least I won't feel so guilty chowing down them down with the pork, heehee. :P
So how? Did this photo nail it? Does it make you want to try it out too? Yes, indeed it involves several steps but I can guarantee you it is definitely worth it. Do it like me, make a big pot and slow enjoy it for a 2 to 3 days, lol! I definitely had my fair share (ahhhh! Exercise time!) and truly satisfied that I made it myself. My whole family loved it, even my elder one whom don't fancy meat usually, had 2 at a go, heehee. (^v^)
Okay folks, gonna go now and hopefully be back soon with more to share. Cheers all!

Wednesday, April 4, 2012

Caramelised Banana Frangiepane Tart

I'm not sure if you are like me, but I have this love for tarts. From my previous posts, you will notice the variety of tarts I've baked before, whether it is sweet or savory, with fresh fruits or cheesy German style pudding tarts, I can't get enough of them! I especially love frangipane tarts with fruits in it. Somehow the buttery flaky crust with that almond nutty filling topped with fruits just make it a perfect desert....for any occasion. One of my all time favorite was the Fresh Cherry Frangipane Tarts. However, today I'm going to introduce yet another wonderful version, Caramelised Bananas Frangipane Tarts. ;)

I actually did a similar tart about 3 years back. The earlier tart I baked has a cream cheese layer on it, so it's like cheesecake in a tart with wonderful caramalised bananas...yum. :) But this new recipe is actually a much nicer version in my opinion since I love frangipane filling more then cheese cake filling. ;P Yes, the almond meal did it's magic some how, lol!
The caramel really help accentuate the taste of the bananas and gives it a deep mallow sweetness to it. Although the usual frangipane tarts are paired with tangy, juicy stone fruits or apples, somehow this caramelised banana worked beautifully. (^o^)

Ingredients for Caramelised Bananas in Frangipane Tart (makes a 10")
Caramelised bananas
5 to 6 bananas. slice into half (ripe but still firm enough)
80g sugar
20g sugar
20ml fresh heavy cream
  • In a heavy saucepan, heat the sugar and water together till it starts to turn amber. That usually takes about 4 to 5 minutes at medium low fire. Remove pan from fire and gently swirl the mixture till the color is even. Then carefully add in the heavy cream. (NOTE: the caramel will bubble once you add the cream in, so please stay at a safe distance and don't get burnt!)
  • Stir in the mixture properly till everything is even in color. At this point add in the bananas halves and place the pan back onto the stove at low heat. Let the bananas cook for another 2 minutes till all has a nice caramel coating. Then set aside for use later.
Sweet Pastry tart Shell:
260g cake flour,
120g cold unsalted butter, cut small,
80g confectioner's sugar,
2 egg yolks,
1/8 tsp salt

60g chopped dark chocolate, melted and cooled (I used Lindt 75% cocoa)
  • In a large mixing bowl, add in the cake flour, powder sugar and salt. then using only your finger tips, work the cold butter into the flour mixture. Alternatively, use a mixer to combine the ingredients till it resembles bread crumbs.
  • Next add in the egg yolks and gently work the dough but not over kneading it. Over kneading the dough will make it hard and not flaky.
  • Chill the dough in plastic wrap for at least 30 mins till ready to be used.
  • After chilling, place the dough between 2 sheets of plastic wrap and roll it out flat to about 1/4" thick. Then gently place the dough over the greased tart shell and press in the sides and making sure the edges are all even.
  • Prick some holes at the base of the pastry shell and chill it again before use.
Frangipane filling
120g butter, soften
120g icing sugar, sifted
1/2 tsp pure vanilla extract
2 large eggs
1 tbsp cake flour
165g finely ground almond meal
  • In a large mixing bowl, beat the butter, icing sugar and vanilla together till well combined
  • Add the first egg and beat well. Then crack the 2nd egg in and continue to beat till mixed in.
  • Then add in the flour and almond meal into the egg mixture and combine well. Set aside for use later.
  • Preheat the oven to 180C and take out the tart pastry that has been pressed into the greased tart tin shells. Note that no pre-baking is needed for the pastry tarts in this recipe.
  • Now coat the bottom of the tart shell evenly with the melted chocolate.
  • Now spoon the frangipane batter into the tart shell and over the chocolate coating.
  • Now gently spoon and arrange the caramelised bananas over the frangipane filling.
  • Bake in the preheated oven for 40 to 45minutes at 175C or till tester comes out clean. If the center is still soft and the sides of the pastry crust is already browning fast, cover the tart with aluminum foil and continue to bake for another 5 minutes.
  • Remove from oven and makes sure the tart is cooled before removing from the pan. Serve warm or chilled whichever rocks your boat. Enjoy!
Overall a great recipe, and definitely will be baked again in the future. Well, at least I know I can use up my ripe bananas other then just banana cake. ;)
This was the last slice that was salvaged after serving @ my in laws last weekend. Everyone loved it, heehee. ;) Hope you all will try it out as well.

Happy baking everyone!