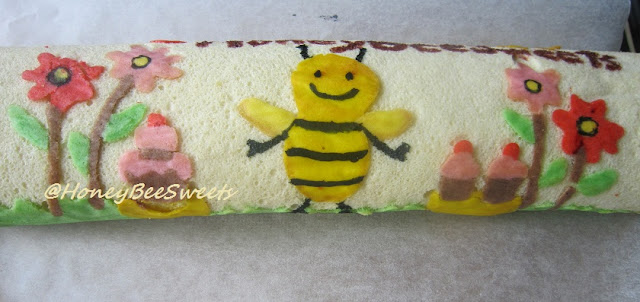
It's my mother's birthday again. It goes without saying I have to bake a nice cake for her as well this year...nicer then the one last year. But because of the recent Father's Day cake I made, my family kind of fell in love with the passion fruit cake flavor. So I decided to bake a passion fruit cake but in the same Swiss Roll cake deco I made for my MIL's birthday cake in June. I have to say this cake is like a marriage of 2 recipes & technique I learned in these months. And this is the result of the happy "marriage", heehee.
I know I should have come up with a new design on the outside, but I really don't have that kind of time leisure, so I just went to the same design as the previous one. But bare in mind that this is a Passion Fruit Swiss Roll Cake...meaning the cake is rolled up just like the one in the Father's Day & my Hubby's Birthday cake I made. Meaning the cake layering are in vertical form. Anyway, I will upload a picture of the sliced cake after tonight's celebration. :)
Instead of using the same recipe of sponge cake (whole egg technique); I decided to change the recipe to using the egg separation method "分蛋式海绵蛋". Main reason is this method yields the softest of all the techniques (i.e. Chiffon, Sponge and egg separation). Here is my recipe:
Ingredients for Passion fruit Cake Batter (13" by 15"):
Set A:
5 large egg yolks
60g caster sugar
110g superfine or cake flour
2 tsp corn flour
Set B:
50g unsalted butter
50ml fresh passion fruit juice (~ 3 passion fruits)
Set C:
6 egg whitespinch of salt
50g caster sugar
Ingredients for Passion Fruit Cream Cheese Filling:
150g unsalted butter
250g cream cheese, room temperature
80g confectioner's sugar
50ml passion fruit pulp
100ml non dairy whipping cream
1.5 tbsp gelatine powder melted in 2 tbsp boiling water
Method:
- Melt the butter together with the passion fruit juice from Set B under double boiler and let cool until needed.
- Line a baking tray with parchment paper and greased it again. Preheat oven to 170C.
- Again under double boiler, beat the egg yolks and sugar (from Set A) till triple in volume and thickens.
- At the meantime, beat the egg white with gradual addition of the sugar in Set C and beat till mixture is stiff peaks.
- In 3 separate portions, add the egg whites into the yolk mixture, folding gently till all is added in.
- Sift in the flours in 3 separate portions as well, using the electric mixer at its lowest speed. Do this till there is no visible lumps of flour and making sure not over beating and deflating the mixture.
- Take about 2 tbsp worth of the batter and mix into the melted, cooled butter mixture. Make sure it is well mixed and then add it back to the cake batter and gently stir to blend.
- For the Swiss Roll decoration details, please kindly refer to this post.
- Finally, pour the batter into the baking tray and level out with a scraper. Then bake in the oven for 13 minutes or till tester comes out clean. Let cake cool completely before use.
- In the meantime, prepare the cream cheese filling: Cream the butter, cream cheese, sifted powder sugar, gelatine mixture and passion fruit juice together till smooth.
- Pour in the whipping cream and continue to whip at high speed till mixture fluff up and increase in volume more.
- For details on how to assemble this cake, please refer to this post.
I really have to work on my piping skill...my Chinese characters are not very nicely done. ;P And hopefully the taste of the cake will work out nice as well tonight. *fingers crossed*
Latest update!
Managed to get a shot of a slice....the cake was indeed very yum, just like the previous time, heehee!
Latest update!
Managed to get a shot of a slice....the cake was indeed very yum, just like the previous time, heehee!
I will be submitting this to Aspiring Bakers #9 - Swiss Rolling Good Times hosted by Obsessedly Involved with Food.
Besides the cake, I also made some "寿桃" (peach) buns for my mum's birthday. Traditionally, these buns that are served during an elder's birthday celebration. Since this was my first attempt, I had a very rough work done...but still presentable...I think, lol!
I had these buns filled with white lotus paste (no sugar added). Had thought of adding salted egg yolk in it too but decided not to, as there's too much work!! :P As for the bun recipe, it's none other then my trusty soft mantou recipe of course, hee. :D
Hope you guys are not laughing your pants off looking at my ugly "寿桃" (peach) buns. :P Seriously need some practice on the shaping. Luckily it is just for my family's consumption....hee. :D But let's hope my mum won't be disappointed in these. *double fingers crossed*
Okay folks, gotta go and prepare for the celebration tonight, will post again soon! Have a great week!


