Showing posts with label lunch. Show all posts

Thursday, April 7, 2016

Porcini Mushroom Cream Pasta

Everyone needs a few favourite "quick cook" recipes to get them through the busy days. Pasta is certainly one of those dishes I will always turn to when I want to whip up a quick meal for the family. And when I say quick, I meant lesser ingredients needed, lesser time needed to get it from the stove to the dinner table. So today, l want to introduce this simple mushroom pasta that uses Porcini mushrooms to "empower" the whole dish. As most of us might have already know, Porcini is a wild mushroom, although it is sold commercially, it is very difficult to cultivate. Thus that explains the slightly steeper pricing. The fragrance of the mushroom actually intensifies more when it is dried, much like other mushrooms like Shiitake. Porcini is commonly used in soups, risotto and of course pastas, thus we often see them appearing in Italian dishes.  
I have actually always wanted to try out cooking porcini mushrooms. So when I saw it selling at selling at Huber's Butchery at Dempsey Hill, it didn't took me long to place it in my shopping basket.

And since I didn't want to mask away the original flavour of the mushroom, I chose to cook it in the simplest form, just with cream pasta.

Recipe for Porcini Cream Pasta (Serves 2-3)

Ingredients needed:

100 - 120 g dried porcini mushroom
1 small onion, peeled and sliced thinly
4 - 5 cloves of garlic, peeled and finally diced
6 - 8 cremini mushrooms, sliced (brown button mushrooms)
2 tbsp salted french butter (if no french butter, other salted butter is fine too)
120-130 ml fresh cooking cream
Soaking water of the porcini mushroom (about 3/4 cup - 1 cup)
1 tbsp freshly chopped parsley

Salt, fresh ground pepper and sugar to taste.
3 rolls of dried egg noodles (Use any brand you fancy)


(Optional protein side, you can choose pork or salmon
1 boneless, skinless chicken thigh 
  • Soak the dried porcini in a bowl of warm water. Leave it to soften up to 1 hour. Remember DO NOT THROW away the soaking liquid. It will be used for the pasta later.
  • In a pan over medium low fire, add butter in and let it slowly melt down. Add minced garlic and onion in. Cook till onions are soften and the mixture is aromatic.

  • Squeeze dry the porcini from its soaking liquid and set aside. Once the onions has soften, add in both the mushrooms. Then season it with fresh ground pepper and salt.

  • Once the mushrooms cooked down, add in another tablespoon of butter. This is to make a rue to thicken the whole mixture. So add in a tbsp of plain flour. Stir in to cook the flour for a minute. Once that is done, slowly pour in the soaking mushroom liquid, whisk till combined.

  • Let the whole mushroom mixture simmer for a few minutes at low fire. In the meantime, cook the dried pasta in some boiling water.


  • While the pasta is boiling, add the cooking cream into the mushroom mixture.

  • Stir it in till everything is well combined. Once the pasta is al dente, remove from the boiling water and straight into the mushroom sauce.

  • Toss together till the noodles are well coated with the mushroom cream. Dish up and sprinkle with freshly chopped parsley.

Serve the pasta immediately. You can have it as is. I actually find the mushrooms hearty good enough to go alone with the noodles. But if you want something more substantial, feel free to cook some protein like pan seared salmon or a pan fried crispy chicken thigh like mine. :)
I seasoned the chicken thigh and coat with plain flour, pan fry till crispy, simple as that. The whole meal got more substantial of course and my kids loves pasta and fried chicken, sure win...

Do try this out and don't be intimidated by a foreign ingredient that you've never used or come close to using. You never know how easy and delicious your next home cooked meal will be until you try it out yourself. ;)

Happy cooking!

Tuesday, March 31, 2015

Fresh Spinach Pasta (Pasta Verde)

A refresh post from my previous one. Newly updated to bring you a better recipe. Enjoy!

"Verde" means green in Italian/Spanish, and Pasta Verde simply translate as green pasta. And The green here comes from Popeye's favorite vegetable, spinach. :) I don't exactly remember how many times, but I do remember it's more then my fingers plus my toes combined together. I'm talking about the number of times I've made fresh pasta at home. I believe anyone whom had tried it and tasted it before will know why go through the hassle to make it your own. It's different from your grocery bought, packaged fresh noodles. Making it at home is the real deal, it's doesn't get fresher then that, trust me. And the tender noodles tossed in your favorite sauce or gravy will totally knock your socks off, guaranteed.

Here I made a version of Garlic Lemon Cream Sauce tossed with the Pasta Verde. With crab meat and pan seared Salmon steak...a wonderful complete meal. Well your vegetables are already in the pasta haha! :P

Look on to see how I did it:

Ingredients for Fresh Spinach Pasta: (enough for 2-3 adults)
3/4 package fresh spinach, using leaves only, wash and rinse dry.
-after I cooked it, it yields about 80g
180g all purpose flour (plus more for dusting and shaping)
1 large eggs

Lemon Garlic Cream Sauce
3 garlic minced
3 tbsp unsalted butter
juice of 1/2 lemon
zest of 1/2 lemon
1 tbsp all purpose flour
300ml milk + 100ml heavy cooking cream
1/2 tsp salt
freshly ground pepper
2 tsp sugar

1 salmon steak, seasoned with salt and pepper and sauteed till golden brown.

Method:
  • In a large saute pan, heat it up 1 tbsp of water, add in the spinach leaves and saute for a couple minutes. It will slowly wilt down. Remove from pan and let cool. Squeeze out the excess liquid and weigh out about 80g of it and set aside
  • In a large mixing bowl, add in the flour, the egg and the spinach. (Note that I doubled my recipe this there are two eggs in the picture) 
  • Mix well until it comes together. Place it on a lightly floured work surface and knead it to form a soft dough. Might be a little sticky, add a little flour and knead till not sticky.
  • Cover the dough in a moist towel and let rest for 10 minutes before shaping it. If you have a pasta maker, it'll be a good time to bring it out and set it up right now. Else a lightly floured work surface and a trusty rolling pin will do too.
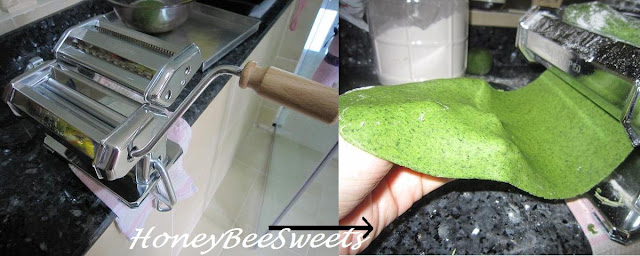
  • Divide the dough into 4 smaller equal portions. Take a portion, lightly dust it with flour and let it pass through the pasta roller at the highest number, meaning thickest.
  • Gradually decrease the number knob to 1 or 2 depending the kind of pasta you want to make and let the pasta roll through a couple times on each number. It will come out into a nice smooth sheet of pasta.
  • Carefully placed the pasta sheets on a lightly floured baking tray and cover with moist towel. Repeat with the rest of the pasta dough portions till all has been rolled out.
  • At this point, get ready a pot of boiling water going at medium high heat. Then change the pasta maker setting so that it will turn the roller on for cutting it into the shape you want. This time I am making linguine. If you do not have the pasta maker, just use a pizza cutter or a knife to slice the sheets into thin strips.
  • Meanwhile, heat up a tsp of olive oil and place the minced garlic in. Saute till lightly browned and fragrant. Add in 3 tbsp of butter and cook till just melted.
  • Add in the 1 tbsp of flour and quickly stir in to cook the flour. Once thicken, add in the milk and cream mixture, lemon juice and lower the fire to smallest. 
  • Stirring constantly till the sauce is smooth. Add in the lemon zest, salt, pepper and sugar. Stir well till everything is well combined. Set aside.
  • Boil the pasta in the water for a few minutes, I would say 3 to 4 minutes since fresh pasta cooks really fast. Scoop it out and toss it in the lemon garlic sauce sauce and add the crab meat..

The pasta is really smooth and delicious. If you are not really a fan of spinach, you can simply omit the vegetables and make plain egg pasta. Reduce the flour to 150g instead. But I am always try to find ways to incorporate more greens into my kids menu, so this is one of the most effective "camouflage" method, lol! Of course the kids knew about the vegetables been made into the pasta, but they didn't taste it, so it's all good. ;P 

 Below is an old picture of my previous post which I made the spinach pasta into sheets and using them as lasagna pasta. Cool right! I should do that again soon. :9


Again, I felt that it's a much better choose over the box version. But of course, the box pasta always comes in handy when you are on the run. ;) Enough said, I do hope you all will try making fresh pasta at home, it's truly a gourmet meal you can share with you love ones. But do note that you should get your sauces ready first before making the fresh pasta. Once the pasta is made, you just have to toss the noodles in your favorite sauce, simple as that. Enjoy everyone!


Monday, February 23, 2015

Seafood Pizza On Wholewheat Sweet Potato Crust

I have been meaning to post up a pizza recipe for the longest time. A good one that I always fall back to whenever I bake one for my kids. Well, today's THE day! I am sharing this easy, delicious and wholesome pizza recipe that I am sure even your family is gonna love it too. :9 Seafood Pizza On Wholewheat Sweet Potato Crust:

This right here is plain old family comfort food. I guess every mother has their own special recipe that they can cheer their own kids up whenever she whip it up in the kitchen. And this, I say is probably one of my kids' top favortites. :) Com-on ... which kid doesn't like pizza? 

Bare in mind, this recipe serves as a basic guide which I am sure you can use the bread crust recipe and top it with another another ingredients you or your family fancy. :)


Let's have a look at the ingredients for my seafood pizza shall we?


Ingredients for Seafood Pizza (makes a 30-35cm diameter, serves 4 pax)
Pizza Dough:
215g bread flour
60g wholewheat flour
50g egg
50g sweet potato, peeled, steamed then blended till smooth
60-100ml water
1/2 tsp salt
20g caster sugar
5g instant active yeast
20g olive oil

*Note the sweet potato is excellent in enhancing the bread texture. 
  • In a large mixing bowl, add in all the ingredients and knead together. I used my KitchenAid to do all the kneading, knead about 10 minutes.
  • Once the dough is pulling away from the side of the bowl and it is very elastic, stop kneading.
  •  
  • Let the dough proof in a greased bowl till it doubled in size. Takes about an hour.
Ingredients for the toppings

200g salmon steak
5 large prawns, peeled and devined 
salt, pepper and dash of sesame oil
5-6 crab-sticks, shredded
1 ripe avocado
1 tbsp fresh lemon juice 

Bechamel  Sauce
50g unsalted butter
2 tbsp plain flour
180-200ml fresh milk
salt and pepper to taste

300g shredded mozzarella cheese
2 tbsp grated Parmesan cheese

  • In the meantime, prepare the topping while the pizza dough is proofing. 
  • Marinate the salmon steak and prawns with salt, pepper and a dash of sesame oil, set aside for 10 minutes.
  • In a saute pan, add 1 tsp of olive oil and add the salmon steak in. Cook till golden and opaque.
  • Next saute the prawns till pink and cooked through. Shred the crab sticks if you have not done so.

  • In a small sauce pan over medium low fire, add in the butter. Once the butter melted and starts to bubble on the sides, add in the flour. Give it a good stir to mix in the flour and cook it.

  • Once it is slightly thicken, slowly add in the milk and whisk well. The mixture will slowly thicken up in a few seconds, so DO NOT walk away. Add more milk if you find the mixture is too thick.
  • Next you add in the seasoning, salt, pepper and stir well. So this is basically the Béchamel sauce that will be going on top of your pizza to go with the seafood. :) Set aside covered to be used later.

  • At this point, the pizza dough should be ready. Check by poking the dough. If the hole stays and doesn't "bounce back", it is good to go.
  • Press out the air and flatten the dough on a prepared baking tray lined with parchment paper. Press it to the thickness you desire, it will poof up a little after baked. Remember to leave a slightly thicker dough edge.

  • Let the dough proof for 15 minutes before baking it. In the meantime, preheat the oven to 200C.
  • After 15 minutes, bake the dough for 8 minutes till it is slightly golden brown on the outside. Remove from oven.
 
  • At this point, you can add the toppings. First you spread the Béchamel sauce over the surface of the pizza leaving an inch on the sides not covered.
  • Next you flake the salmon steak and sprinkle the meat all over the pizza top, followed by the prawns and crab sticks.

  • Now you can cut the avocado, remove pit and scoop out the flesh. Slice the avocado into thin wedges. Then remember to give it a good squeeze of lemon juice to prevent it from browning.


  • Place the avocado wedges on the pizza, follow by the two cheeses.

  • Bake the pizza in the preheated oven at 200C for 10-12 minutes till the cheeses is golden brown. Remove from oven and let cool for 5 minutes before slicing.

This is seriously delicious, I promise. :9 That crusty wholewheat bread topped with creamy béchamel sauce, and that sweet chunky seafood and cheesy mozaralle....no wonder my kids loved it so much. :D

Check out the sliced section. The fluffy pizza dough....yes it is wholewheat too. You won't want to miss out trying this out. :) If you do, let me know how it worked out for you! ;)


Alrighty, need to call it a night! Thanks for tuning in again. ;) Happy cooking or baking guys!


Friday, May 17, 2013

Burnt Bottom Rice Vermicelli with Pork Gravy (MFF featuring Sabah)

Hi all! Sorry for missing in action again. It's no surprise as it was the exam season and thus being the mummy and worried as always, had to be studying with my kids. :P I guess most mummies does that nowadays. :( But today was her last paper and hooray! Away are the books and time to rest and relax! As my kids are watching "Alice In Wonderland" on TV now, I can happily blog away, haha!

I finally did a dish for this month's MFF featuring Sabah! I actually cooked this dish 3 days back but had to wait till today to post it. :P Anyways, this was a great simple homey dish that I highly recommend to any mommies! Simple ingredients, simple to prep and cook and with such clear steps shown on Wendy's blog...you can't go wrong, really. Most importantly, it is delish!

Ingredients for Burnt Bottom Rice Vermicelli with Pork Gravy (Serves 2)
100gm rice vermicelli
3 eggs (beaten lightly and season with 1/2 tsp light sauce and dash of pepper)
1 shallot, chopped fine
1 garlic clove, chopped fine
150gm lean pork, sliced thinly
Marinate for the pork:
1.5 tsp soy sauce
1/2 tsp sugar
1/4 tsp sesame oil
1 tsp corn starch

 Gravy
3 tsp corn starch
1.5 cup water
1 tbsp oyster sauce
1 tsp sugar
salt, soy sauce and pepper to taste
  • Blanch the rice vermicelli in boiling water for a couple minutes. Rinse and set aside for use later.
  • Marinate the pork slices for at least 20 minutes.
  • Heat up the work and pour the egg into the work, making sure the fire is at medium low.
  • Gently place the vermicelli in the center of the egg and let cook for another minute before flipping the whole egg and noodle so the vermicelli will be at the bottom.
  • Cook the vermicelli for at least 5 minutes and lift to see making sure it didn't burn. Once the vermicelli takes on some golden colour and crisp up a bit, dish out on a big bowl with the egg side up, set aside.
  • Prepare the gravy, mixing everything together and making sure no lumps.
  • Now add a little more oil, and heat at medium low. Add in garlic and shallots and cook till fragrant. Add in marinated cook slices and stir to all cooked. 
  • Add in the prepared gravy and cook till it thickens.
  • Dish up the pork over the egg and scoop gravy and drizzle all over. Serve while still hot!
Doesn't this just look so homey and totally comforting to you? I am sure to make this again as my kids really enjoyed it. It is important you marinate the pork earlier so that it will be tender and soft.

A picture to show you how yummy it is inside where the vermicelli soaked up all that awesome gravy, haha! Go now, go make a bowl for yourself my friends....you can't go wrong with this. :)

I am happy to submit this to Malaysian Food Fest Sabah Month hosted by Mary Of a Pepper's Love

Okay, got to run folks, got a movie to catch! Watching Star Track "Into the Darkness" with hubs, haha! Have a great weekend all! 


Saturday, April 20, 2013

Ham and Stewed pulled-beef Quesadillas

 I made quesadillas! I can't remember the last time I made these...but I used to whip up quesadillas so often for a quick lunch when I was in CA. Perhaps it's because I can't find flour tortillas until lately it starts "popping out" in the neighborhood grocers. It's getting more popular in Singapore, where people starts to use it for  And it didn't register in my mind until lately that I decided to make my all time favorite easy quesadillas!

I actually made two different fillings, one with Ham, the other with stewed pulled-beef. Since my hubs is on a non-beef diet, I only made one set for myself, haha!

Ingredients (serves 4)
Scrambled Eggs
4 large eggs
4 tbsp of milk
salt and pepper to taste
1 tbsp butter
  • Crack the eggs into a mixing bowl and add in the milk, salt and pepper. Whisk it well till you see small bubbles on the side.
  • On the non stick pan at low fire and add 1 tbsp of butter. Once the butter melt, add in the egg  mixture and once you see the sides starts to solidify, use spatula and gently push in towards the center. Continue to do this until the mixture is not runny but still glossy.
  • Immediately remove from the fire and set aside. It will continue to cook even after you plate it, so do not over cook it and will be rubbery and not fluffy.

6 flour tortillas
4 eggs
6 -8 slices of ham, torn into bite size
2-3 oz of stewed pulled-beef
Sauteed portabella mushrooms (Sliced and cooked for 5 minutes with just salt and pepper)
250g shredded quesadilla cheese (Mixture of cheddar and monterey jack)
Some julienned green onion
  • In a non stick pan, place one of the flour tortilla on it at medium low fire. 
  • Quickly sprinkle some cheese on half of the circle and follow by all the desired toppings, namely some egg, ham/pulled-beef, mushrooms, green onion and lastly more cheese.
  •  
  • Flip the other empty side on over to cover the filling to make it into a semi circle. Then flip the whole quesadillas to let it cook and melt the cheese.
  • Remove from pan when both sides of the semi circle has crisp up. Then cut the semi circle into half. 
  • Serve while still warm.
At first I was a little worries my little ones were not acceptable on this new cuisine, but surprisingly they loved it! Crisped up tortilla, savory meats, soft fluffy eggs, juicy mushrooms and gooey cheese, what's not to love? I actually preferred the pulled-beef version, so much heartier...definitely a very satisfying meal indeed! You can always substitute the ham or beef to roast chicken meat, it should be equally yummy!
I actually reduced the stewed beef sauce to make it thick as a dipping sauce for the beef quesadillas. It's actually not a bad idea! Lol! 

Anyway, hope this recipe is easy and fun enough for you to explore and try out. Have a great weekend everyone! Cheers!

Tuesday, January 15, 2013

Seremban Hakka mee - Seremban MFF

If you live in Singapore or Malaysia, I am sure that you are familiar or even tasted  "Ba Cho Mee" (肉挫面) which is essentially means minced pork noodle. This local delight can be found in essentially any hawker place in Singaproe. But my first time tasting the all traditional Seremban Hakka Mee was when I was staying in Petaling Jaya a few years back. This little store nicely hidden in a place call Arman Suria, sells the best Char Siew Fun (roast pork / BBQ pork rice) I have ever tasted...serious! The meat and fat literally melts in your mouth! And their other best seller was their Seremban Hakka mee. It was super delish! And frankly the taste is quite different from the version in Singapore. And every time I visit KL, that store is a must go, lol!

When I saw this month's MFF featuring Seremban, I was delighted! Knowing that there will be fellow Malaysian bloggers posting up this Hakka mee recipe, haha! But little did I know, there was already a good recipe around from Baby Sumo. :) And she has conveniently used Cintan instant noodle in place of the traditional Hakka noodle, I like! (Knowing that I won't be able to find the latter, lol!) So here it is, my Seremban Hakka Mee.

Since I made this for my little ones as lunch, I have decided to omit the step of making the pickled green chillies. I know I know...what a loss! But I swear I will do it the next time, heehee. :D I will repost the recipe for easier reference next time. Thanks to Baby Sumo for this great recipe!

Ingredients for Seremban Hakka Mee (Serves 4)
4 servings of  non-fried flat noodle (I used Cintan instant noodles)
250g ground pork
4-5 pieces of dried shitake mushrooms, soaked and diced
4 garlic cloves, minced
2 tbsp cooking oil
2 tbsp fish sauce
2 tbsp soy sauce
1 tsp chicken stock seasoning
1 tsp sugar for taste (optional)
Enough water for the mince pork gravy (about 300ml)
1/2 tsp sesame oil (optional)
  • In a large wok, heat the oil over medium high heat. Add the minced garlic and stir fry for 2 minutes till fragrant. 
  • Add in the minced pork and stir fry for 2 minutes. Add in fish sauce, soy sauce, chicken stock seasoning & sugar and stir in well. Lastly add in the water and let the meat stew over low heat for 10 minutes. Feel free to add more water if more sauce is desired.
  • Bring a pot of water to the boil and cook the noodles for 3 minutes,or until al dente. Drain and divide into two bowls. Sprinkle some sesame oil over the cooked noodles and toss to coat.
  • To serve, top the noodles with the minced pork with gravy, and some spring onions. Serve while still hot.
I love the addition of fish sauce in the meat sauce...really brings out the wonderful flavor, yum yum. By the way, I added a bit of sugar to balance off the taste, and it worked pretty well for me. :) And the addition of sesame oil in the noodle also makes it more fragrant. :) But all these are optional...base on your own preference of course.
Now, a look at the picture just want to make you say "Ahhh..." Lol! I really enjoyed this dish, will definitely cook it again. Thanks again Baby Sumo. ;)

I am happy to submit this post to Malaysia Food Fest, Negeri Sembilan month hosted by Hody of Cook 4 you & me.