Friday, August 28, 2015

Pandan Chiffon Cake (with coconut oil)

I realise I never actually posted a pandan chiffon cake recipe before. @_@ Weird I know...that is probably one of the most baked and blogged about recipe on this whole media platform. :P I probably thought I did a write up before but I never did. Talk about goldfish memory. What's better was I came up with this recipe because I wanted to use up that bunch of fresh cut pandan leaves that is wilting by the day!

Well I guess it is better late then never! And better yet, this bake is a healthier rendition. Skipping the use of coconut milk and incorporate it's healthier counter part, coconut oil instead. WooHoo! Me love coconut oil!
Difference in taste is pretty much insignificant to me. And the thought of this being the healthier bake, even if it was not as amazing as the original, I would still go with this one. Like I always say, eat healthy and stays healthy...if possible lah. By removing the coconut milk, it reduces much of the cholesterol. Using superfood coconut oil, it is still really fragrant and 

Note that I did not want to introduce other forms of liquid (i.e. water) into the batter, so I used the evaporated milk to blend with the pandan leaves.

Ingredients for Pandan Chiffon Cake (Makes a 20-22cm tube pan size)
70 g egg yolk (~4 large)
8 pandan leaves
160ml evaporated milk
100 ml coconut oil
120 g cake flour

180 g egg white (~4 large)
100 g caster sugar
  • Snip the pandan leaves into smaller pieces. Place them into the blender together with the evaporated milk.
  • Blend till all the pandan leaves are pulverised and well combined with the evaporated milk.
  • In a large mixing bowl, add in the egg yolks and using a kitchen gauze cloth, sieve the pandan mixture through it and into the mixing bowl. Be careful not to get any of the pandan leaves into the bowl, you don't want to taste that in the cake.
  • Weigh and add in coconut oil.
  • Whisk the mixture till it is well combined. Sift in the cake flour and mix it well again.
  • Preheat the oven to 165C.
  • Beat the egg whites till foamy, then gradually add in the caste sugar and beat till stiff peaks.
  • Fold in the egg whites in 3 separate portions to the egg yolk batter. Making sure it is well incorporated and at the same time not over beating it.
  • Pour the batter into a 20-22 cm tube pan. And use a tooth pick to run through the batter to remove any air pockets that might be trapped inside.
  • Bake in the preheated oven for 30 minutes or till the cake tester comes out clean.
  • Once baked, remove from the oven and invert to cool completely before removing from the tube pan.
I suck big time at removing the chiffon from the tube pan...and that is why that 50 shades of brown. :P But a well baked chiffon should not give you too much of a problem in removing it anyways. 


The fluffy soft texture of the cake. Nope, the coconut oil replacing the coconut milk did not make it any less tasty...at least it is that for my end. Do try it out and find out on your own.
Hope this last shot is enough to convince you to give this healthier rendition a try. ;) 

Where you can buy coconut oil:
  • NTUC finest or Xtra where the organic food section is.
  • Gobuylah.sg, search for "Coconut oil", a couple results will pop up. Delivery is free of charge.
Happy baking guys!


Friday, August 21, 2015

Claypot Chicken Rice (瓦煲鸡饭)

I have so many backlogs these days it scares me sometimes. :P But I know I just need to plan out my time properly and all will be good.....or not? Nowadays doing a post is a leisure, really. But I know there are people out there that can do way more then I and still make their blog looks like all professional with amazing photos and detailed write-ups.  Anyway, enough ranting, I am better off "ranting" about the recipe I am about to share with you all. The delicious and homey Claypot Chicken Rice. Somehow eating claypot rice just gives me that nostalgic feeling, don't you?

Perhaps it's the way it is served. All tossed and mixed, with that rustic feel. Or perhaps it's the ingredients and taste it has, that resembles a traditional dish served at home. Whatever it is, this is a dish that every household should learn how to make. 一家人吃同一煲饭。

The ingredients are relatively easy to gather, let's take a look at them now:

Ingredients for Claypot Chicken Rice (Serves 4-5 pax)
You will need a 20-22cm claypot

150 g plain rice
150 g glutinous white rice (soaked for 1hr)
1 knotted Pandan leaf
450 ml clear chicken stock or water

2 chicken drumstick, 2 chicken thigh and 2 chicken wings, chopped smaller

3 garlic, peeled minced
8 Shallots peeled and sliced thin, 3/4 to fry till golden crisp, 1/4 to cook with chicken
5-6 slices of ginger
2 tbsp dried shrimp, soaked till soften and chopped
3 dried shiitake mushroom, soaked and soften, sliced thin
1/2 Chinese sausage, soaked in warm water, remove casing and sliced thin
Note: Reserve the mushroom soaking water for cooking the rice later. Extra flavouring!
 
Marinate for Chicken
1 tbsp Chinese cooking wine 
1 tbsp dark soy sauce
1 tbsp light soy sauce
1 tsp sesame oil
1/4 tsp ground white pepper

Seasoning for toppings
2 tbsp oyster sauce
1 tbsp sugar

Topping / Garnish
1 spring onion, thinly sliced
Crispy fried shallots
2 tbsp sweet dark soy 

  • In a mixing bowl, place the chopped chicken pieces, followed by the marinate ingredients. Mix well and let it sit for a good 30 minutes before use.
  • Heat up the Claypot with some cooking oil over medium fire. Add in the minced garlic, sliced shallots and the ginger slices, Cook till aromatic and slightly soften.


  • Add in the chopped dried shrimp, chinese sausage and shiitake mushroom slices. Cook for a couple more minutes until you can smell the aromatic. 


  • Next, pour in the marinated chicken pieces and start cooking together with the other ingredients. Add the Seasoning for Topping. Stir and coat well.


  • Cook the chicken mixture still it starts to simmer. Cover and continue to simmer for another 10 minutes on low fire.
  • Once cooked, remove from the claypot and set aside.

  • No need to wash the claypot at this point. Just add in both the uncooked rice, the knotted pandan leaf and 450 ml water / Chicken stock.

  • Bring it to a simmer, cover and let cook at low fire for 15-18 minutes. You can peep open after 15 minutes to check if it is cooked. Bare in mind you need to use the lowest fire, else the base will all be burnt. :P

  • Remove the knotted pandan leaf. Add the cooked chicken pieces and ingredients all on top.

  • Sprinkle the chopped green onion and fried crispy shallots over the top.

Of course the dish will not be complete until you drizzle that black elixir over...I mean sweet dark soy sauce. :P
If this doesn't look good to you...I surrender haha! 

Give it a good toss and mixing...you are ready to eat! So simple to prepare and so delicious too!

You can replace the chicken dark meat to chicken breast for a healthier version. Or a more sinful one will be roast pork. :9 Whichever the variation, the other ingredients can be kept constant. 

Do try it out and let me know how it works for you. Happy cooking y'all!


Wednesday, August 19, 2015

Pulut Hitam (Black Glutinous Rice) Bread Buns with Coconut Cream Cheese 黑糯米面包

I guess to many, it comes with no surprise that I will eventually churn out this recipe. Exploring new flavours can be really fun, even though the end result can't be guaranteed. But applying the same bread baking techniques, it should pretty much be a success. But I realise I am posting up quite a fair bit of bread recipes lately. :P Old habits hard to kick. Yay to carb love! This Pulut Hitam bread is another keeper, especially useful when you have left over Pulut Hitam BuBur. Hop over to my previous post for the dessert porridge and Pulut Hitam chiffon cake recipe of you missed it. ;)

Eh...pardon that liao liao (wrinkly) look on the buns. I guess my shaping skill can still use some more practice. :P But the dough is actually quite easy to handle or shape. I probably got greedy and stuffed too much filling and thus this "abstract" look on them. Anyway, like my better half would always comfort me "Ai ya, delicious can already lah!". :P

From the ingredients, you can already how fragrant and rich these buns are. Added both coconut cream and fresh milk, but you can opt to use all coconut cream. But as for the butter and coconut oil, I suggest adding both. Coconut oil gives it that super nice aroma and butter makes it creamier after taste. So yeah, don't skim on those fats. :P

Ingredients for Pulut Hitam Buns (with coconut cream cheese) 
350 g bread flour
100 g Pulut Hitam Bubur (Black glutinous rice dessert porridge, thick, refer to here fore recipe)
30 g caster sugar
1/3 tsp salt
5 g instant active yeast
90 ml coconut cream
110-120 ml fresh milk
20 ml coconut oil
25 g unsalted butter, room temperature
  • In a large mixing bowl, add in all the ingredients except the butter.

  • Knead everything together at medium low speed. Dough will be sticky at first but continue to knead for 5 minutes and break 3 minutes until the dough pulls away from the side of the mixing bowl.

  • You can see from the above pic that the dough is soft and elastic but has already pulled away from the mixing bowl. At this point, add in the room temperature butter and continue to knead again. Once the dough pulls clean away from the side of the bowl, it is ready. You can test by doing the window panel test. Taking a portion and stretch it and if you can stretch it to the thinest and yet doesn't break it, thats window panel stage.


  • Place the dough back in the bowl but make sure you grease it with some oil or butter. Cover with plastic wrap and let proof till doubled in size or for 1.5hrs.

  • Punch out the air and weigh out 15 portions of 40 g (total 600 g) of dough. Any left over buns can be made into any other small buns of your reference. (Have fun shaping and use your creativity!). 
  • In the meantime, you can make the coconut cream cheese filling. You can opt to leave them plain or fill them with some other ingredients like red bean paste etc.
Coconut Cream Cheese Filling 
200 g cream cheese room temperature
1 tsp fresh lemon juice
2 tbsp coconut oil
2 tbsp confectioner's sugar (sifted)
- Mix all the ingredients together till creamy and smooth.
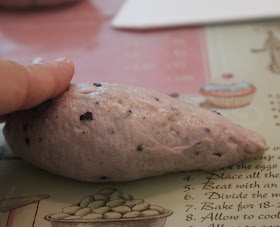
  • Take one of the 40 g dough portion. Press it flat into an oval shape. Place about one tbsp of the coconut cream cheese filling on the wider surface top. Then seal up the edges, and the bun will look at a drumstick.

  •  Note that the middle bun will be all round, no need to shape it like a drumstick. 

  • Repeat for the rest of the dough portions and carefully place them into a greased 8" round baking dish. Then cover with plastic wrap and let proof for 30 minutes and preheat the oven to 175C.

  • Bake in the preheated oven for 25-28 minutes till golden brown. Remove from baking dish and let cool on the rack completely before storage...or just tear off a bun and enjoy!


My kitchen... in fact my whole house was filled with such wonderful aroma! Coconut and pulut hitam seems like the prefect combination. 


With the addition of cooked glutinous rice to the dough helps makes the dough extra soft and moist.

Hope this last shot will convince you enough to give this recipe a try. Fluffy goodness~!
So the next time you cooked Pulut Hitam BuBur, and have some left over (or just purposely set aside 100g), make sure you bake these fluffy buns. ;)

Happy baking and enjoy your day ahead everyone!


Thursday, August 13, 2015

Pulut Hitam Chiffon Cake / Black Glutinous Rice Chiffon Cake

I am pretty sure most of the people my generation loves Pulut Hitam (Black Glutinous Rice) porridge dessert. It is one of those classic desserts that you can never go out of fashion eating it any time of the day or year. I ever come across a couple articles saying that black glutinous rice / black rice is a new cancer-fighting superfood too! Being rich full of beneficial minerals, this wondrous grain is more then meets the eye. :) So if you ever wonder what to order when you stand in front of the dessert store at the hawker....choose Pulut Hitam Bubur.

If you have been following my past recipes, you would know that I even tried baking a Pulut Hitam cupcakes. ;) In fact, I make this Pulut Hitam BuBur rather often. It's easy...period. All you need is a trust rice cooker to do all the work for you. ;)
Before I go into the Chiffon cake recipe. I will share my all too easy to make Pulut Hitam BuBur   (Black Glutinous rice porridge dessert) recipe.

Ingredients for Pulut Hitam BuBur (Blick Glutinous Rice Porridge dessert)
200 g black glutinous rice, soaked for 2 hours
800 ml (adjust if needed)
2 pandan leaves, knotted
150 g gula melaka
1/3 tsp salt

fresh coconut milk / cream for topping
  • In a large bowl, place the black glutinous rice in water just enough to cover it. Let it soak for 2 hours. There after, drain away the water.
  • Place the rice, pandan leaves together with the water in the rice cooker. Set to cook function. My rice cooker has a brown rice function which I find it rather useful for this case as it cooks and breaks down the grains further.
  • Do check on it now and then to make sure the water is not dried out. Add more if needed. But please bare in mind, the thicker the better. So don't thin out the mixture if not needed.
  • About 30 minutes into cooking, add in the gula melaka and salt. Stir in a little and let it continue to cook.
  • When it is cooked, the mixture should be thick and the grains has been broken down. Give it a taste test, add more sugar if needed. 
  • At this point, you can enjoy this warm dessert, with a good drizzle of that cold coconut cream over it. But do remember to set aside 150 g for the chiffon cake recipe. 

Of course you can omit the above step and get your Pulut Hitam Bubur from the hawker. But then you will probably have a thinner consistency and not as fragrant. :P Yes, homemade is always better yo.

So now that you have enjoyed that bowl of sweet warm porridge, let's proceed to bake that chiffon cake. 

Ingredients for Pulut Hitam Chiffon Cake (makes a 21 or 22 cm tube pan)
Egg white batter
70-73 g egg yolk (~4 egg yolks)
150 g cooked Pulut Hitam BuBur (thick)
40 ml coconut oil
70 ml  coconut cream / milk
70 ml water
110 g cake flour

Egg white batter
~190 g egg white (~4 egg whites)
90 g caster sugar
  • Blend the pulut hitam bubur with the coconut oil for a good 30 seconds. It is okay if it is slightly chunky.

  • In the large mixing bowl, add in the egg yolks, the blended pullout hitam mixture, coconut cream and water.

  • Whisk it in till no lumps. Next add in the cake flour and whisk well to combine. 

  • Preheat the oven to 165C. 
  • In another mixing bowl, beat the egg white till foamy. Gradually add in the sugar and increase the beating speed to medium high. Beat till it reaches still peaks.

  • In 3 separate portions, fold in the whites to the yolk batter.

  • Pour the batter into the tube pan and use a toothpick to give it a good swirl to remove any air pockets trapped in the batter.


  • Bake in the preheated oven for 30-35 minutes till the cake tester comes out clean.

    • Once it is fully bakes, remove from the oven and invert to let cool completely. Only when it is called, then you gently unmould the cake from the tube pan.

    The texture of the cake is amazing if I do say so myself. It is really soft, moist and aromatic. If I am cooking Pulut Hitam Bubur again, I am gonna double the amount so that I can bake two of these chiffon!
    Check out the soft composition of the cake. I can totally eat this any time any day...much like the Pulut Hitam BuBur. Yup it is just as good!
    A good close up for good measure. Don't think I need to convince you any further... this is highly recommended! Try and let me know. ;)

    Happy baking all!